My daughter and I went a little paper flower mad yesterday.
It turned out that she was rather good at paper flower making, turning out beautiful blooms after just a couple of tries.
So if a 12 year old can do it………….
Start with pages torn from a very old book that is unlikely to see any further action than to be pulpped for field fertilizer.
I used an old yellowing novel from my own shelf and a couple of larger ones bought from my local Scope shop.

Simply cut a spiral, free hand, with scissors.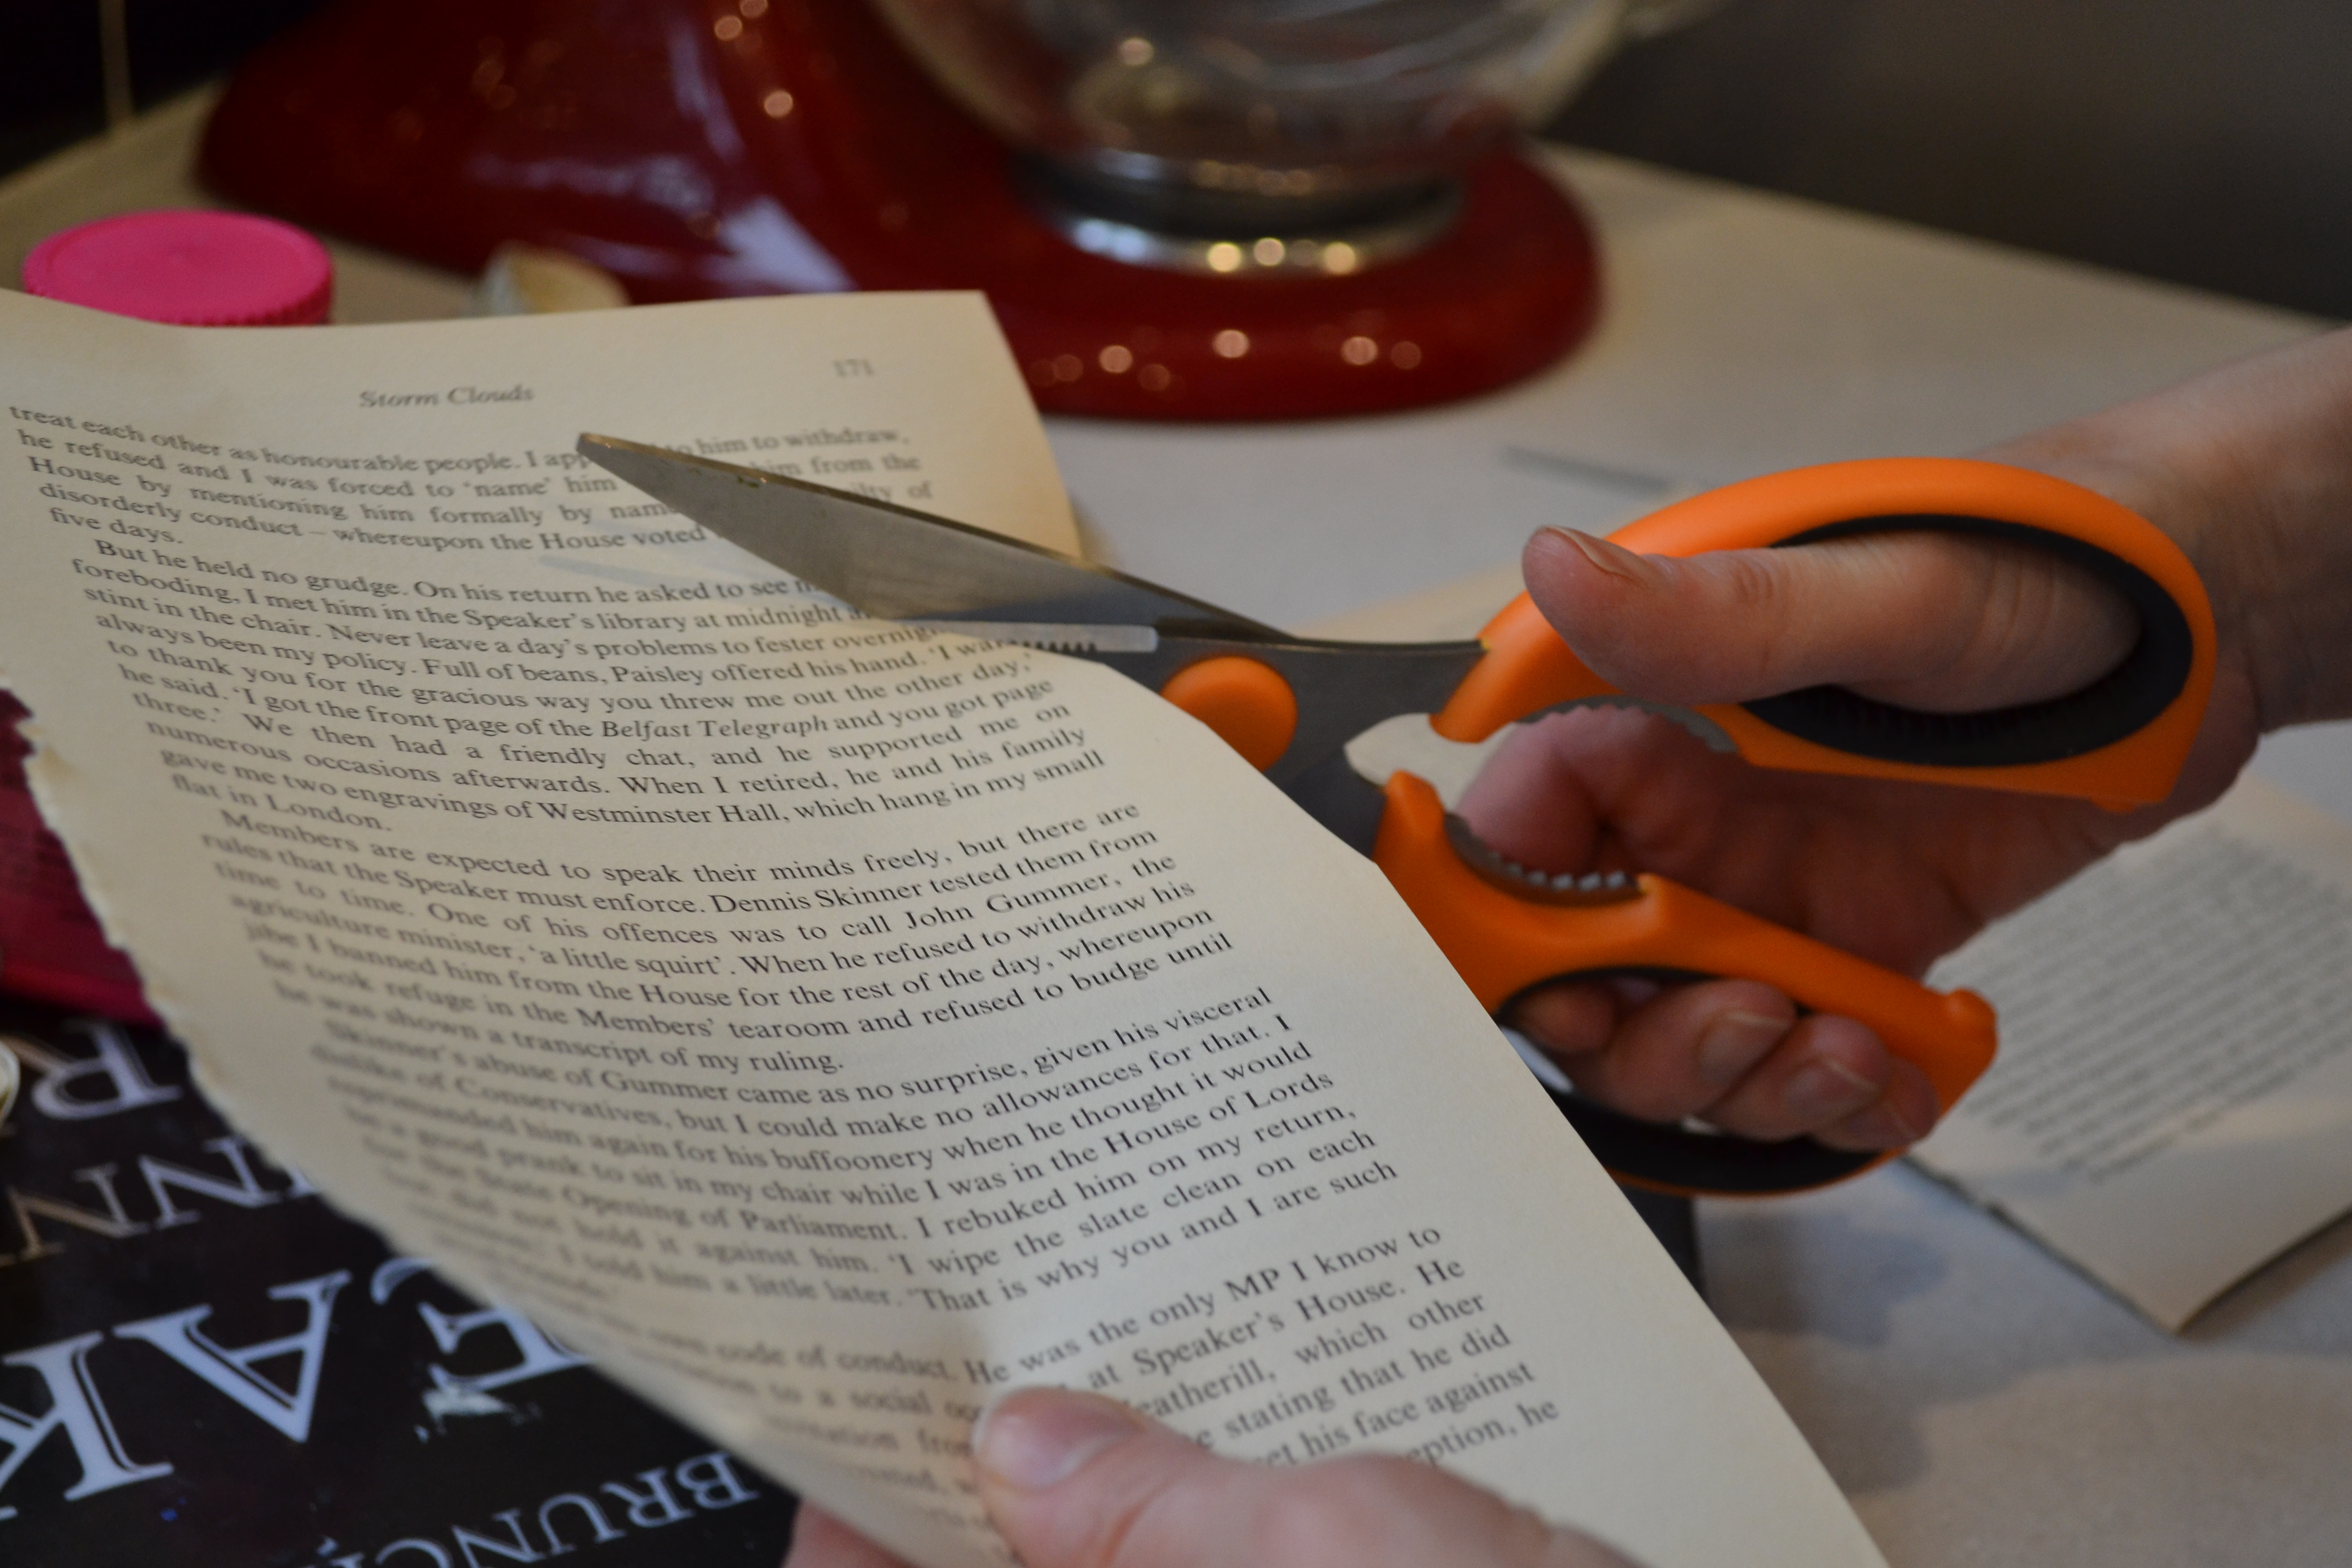
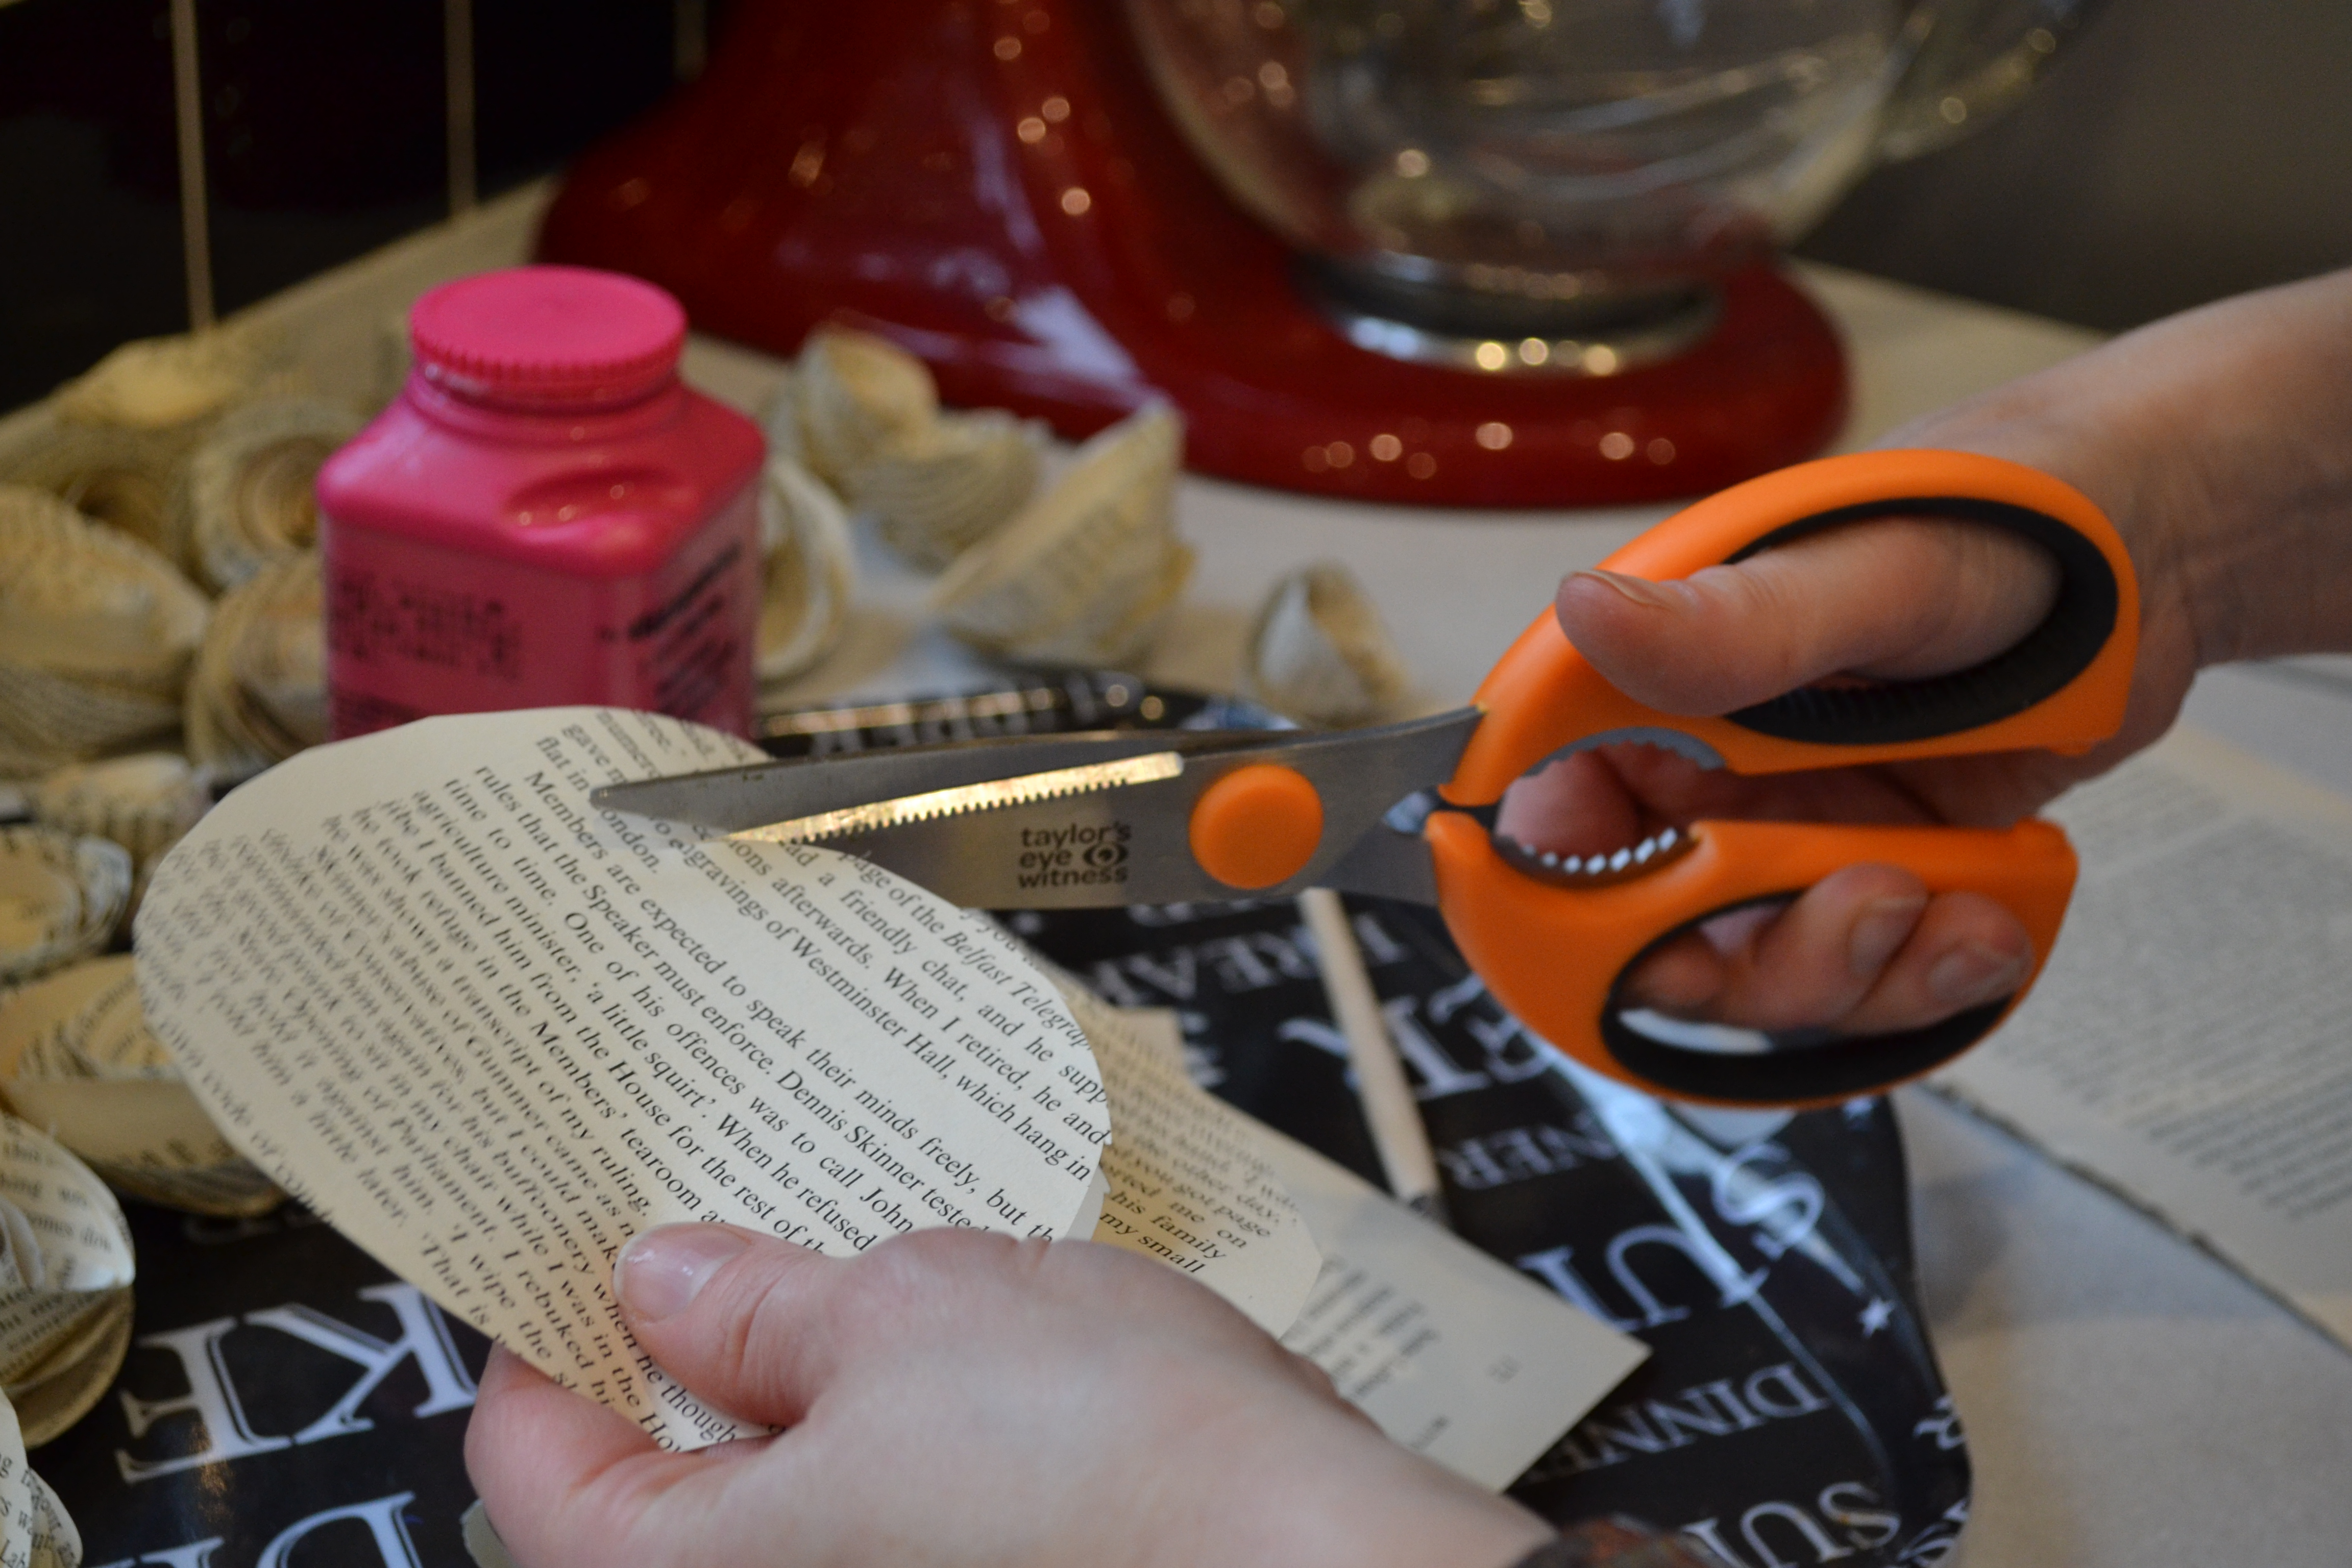 There is no need to draw it out. A slightly wavy shape is better. Leave the round disc shape at the end.
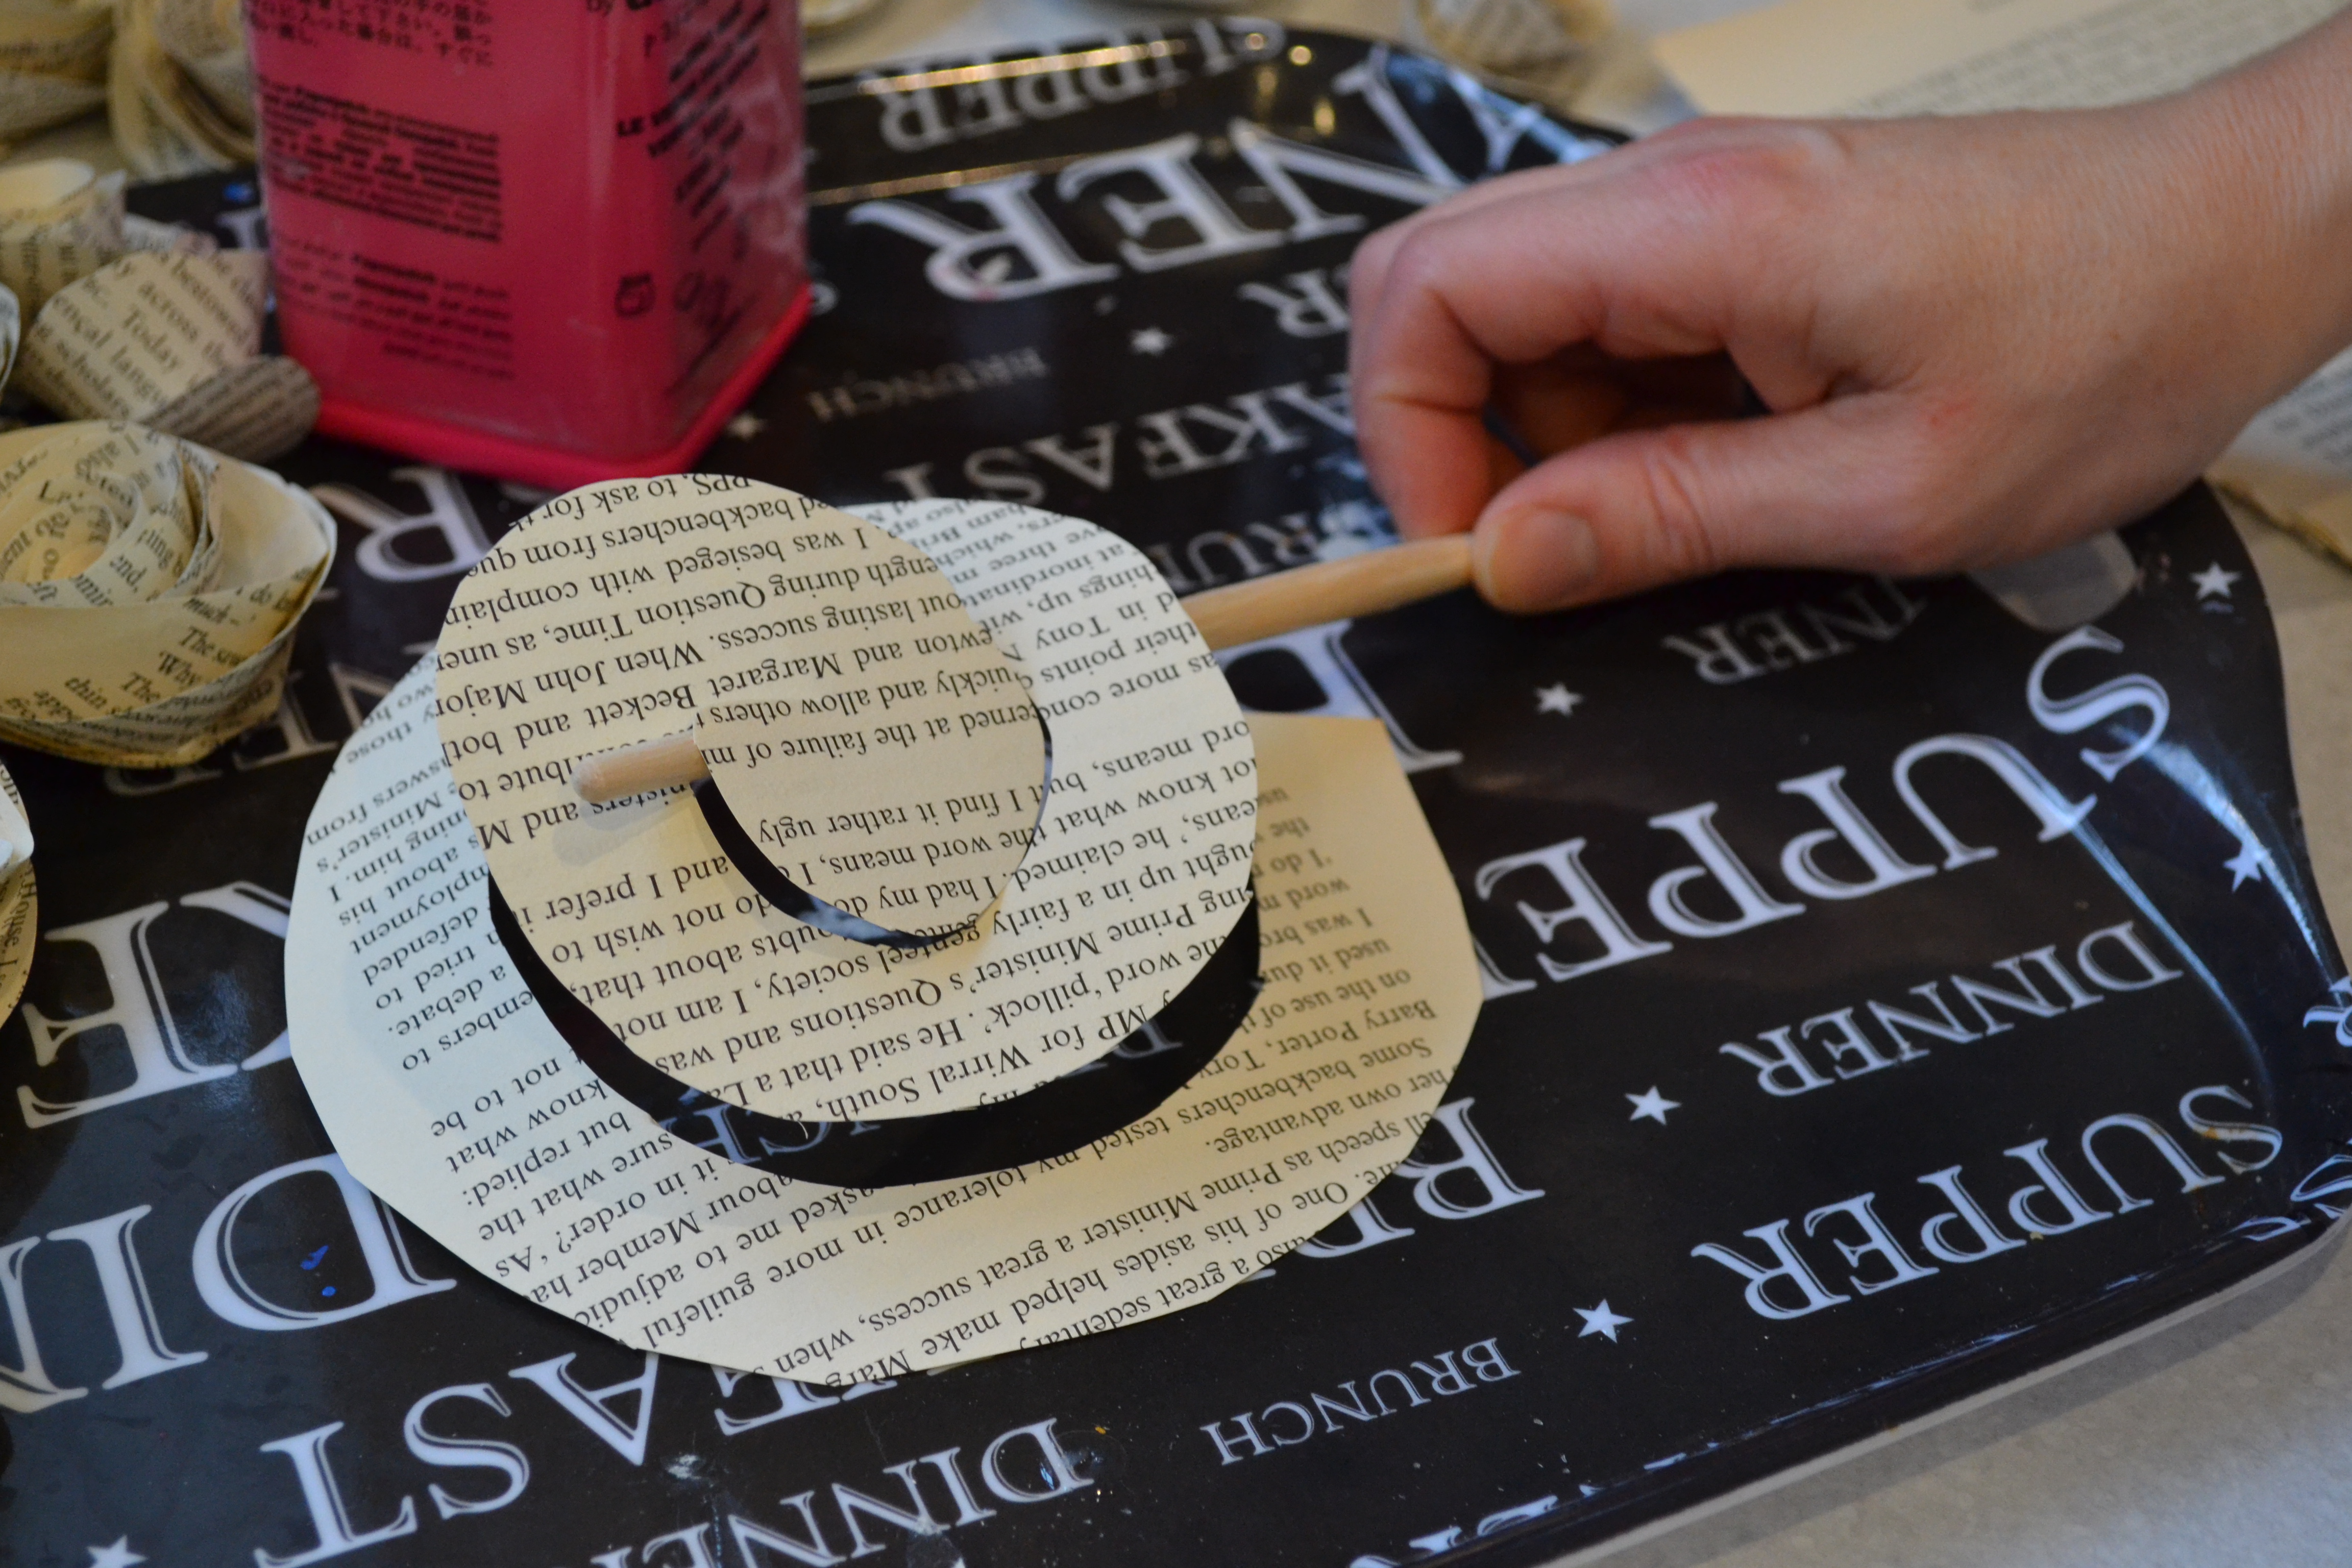
Working from the outside of the spiral, wind up the paper using a fine knitting needle or even a cocktail stick.
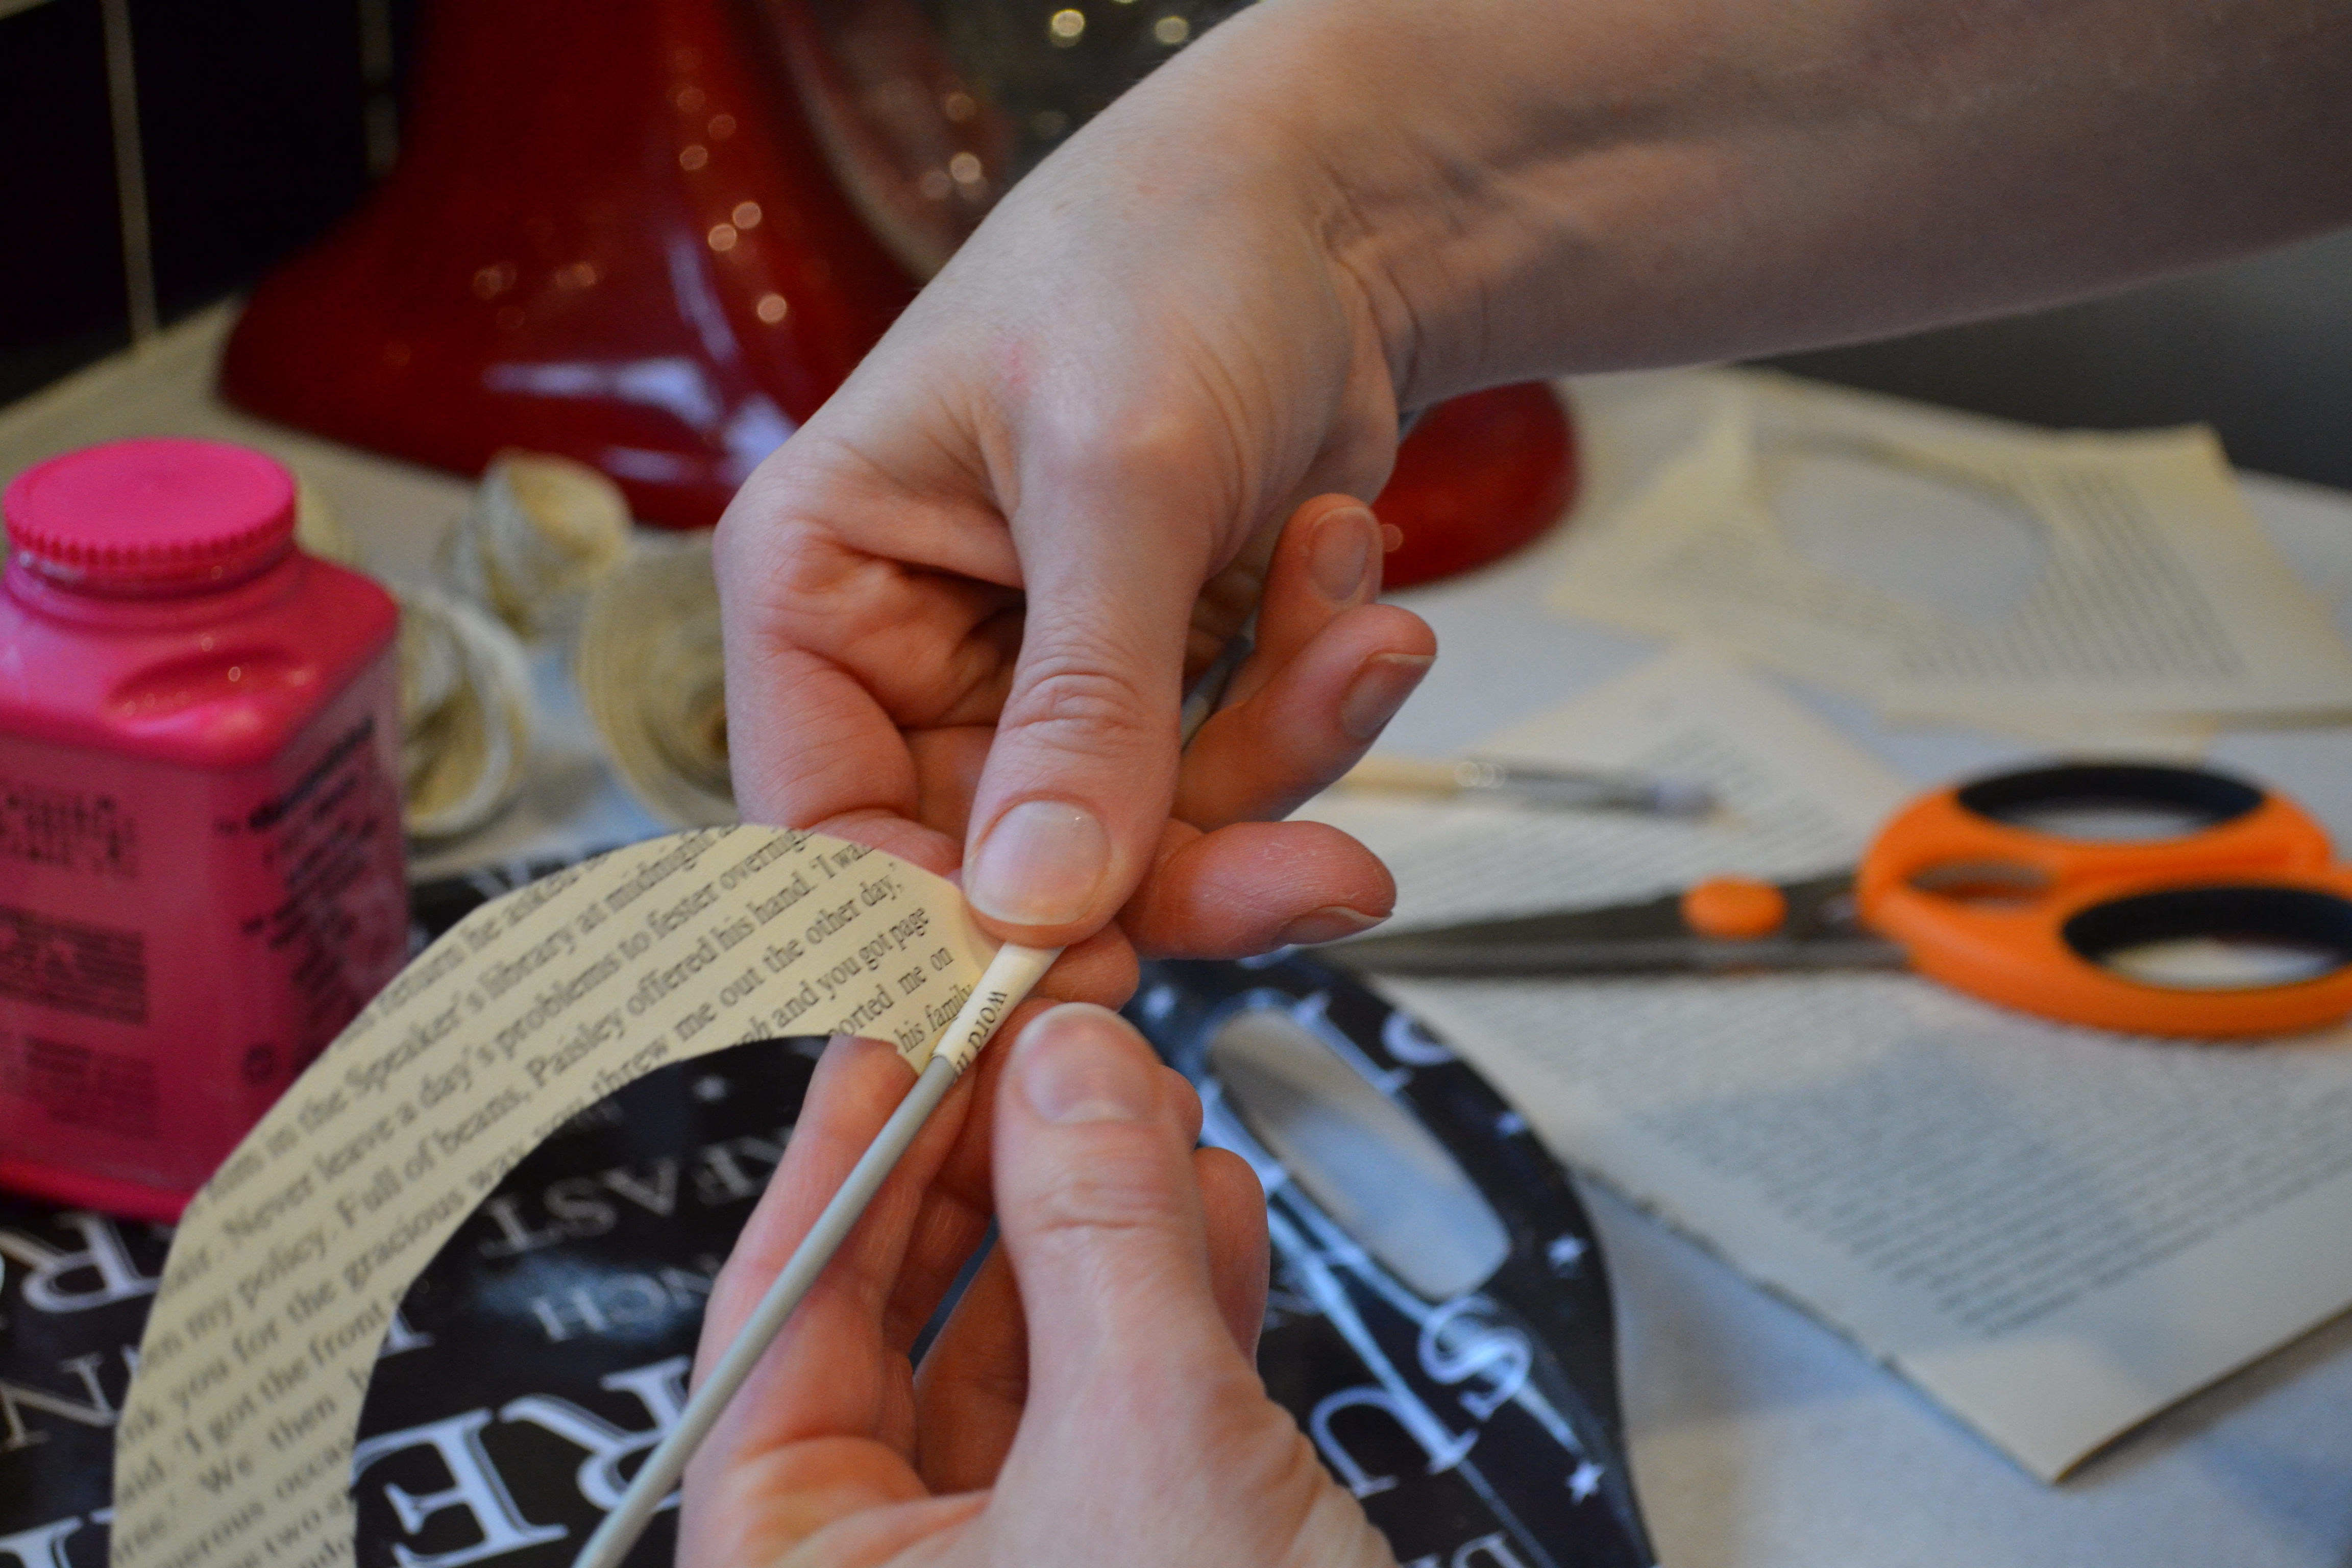
When you wind, try and keep the inside edge of the paper level with that that is on the needle and let the outer edge just do it’s thing. This outer edge won’t be wound so tight.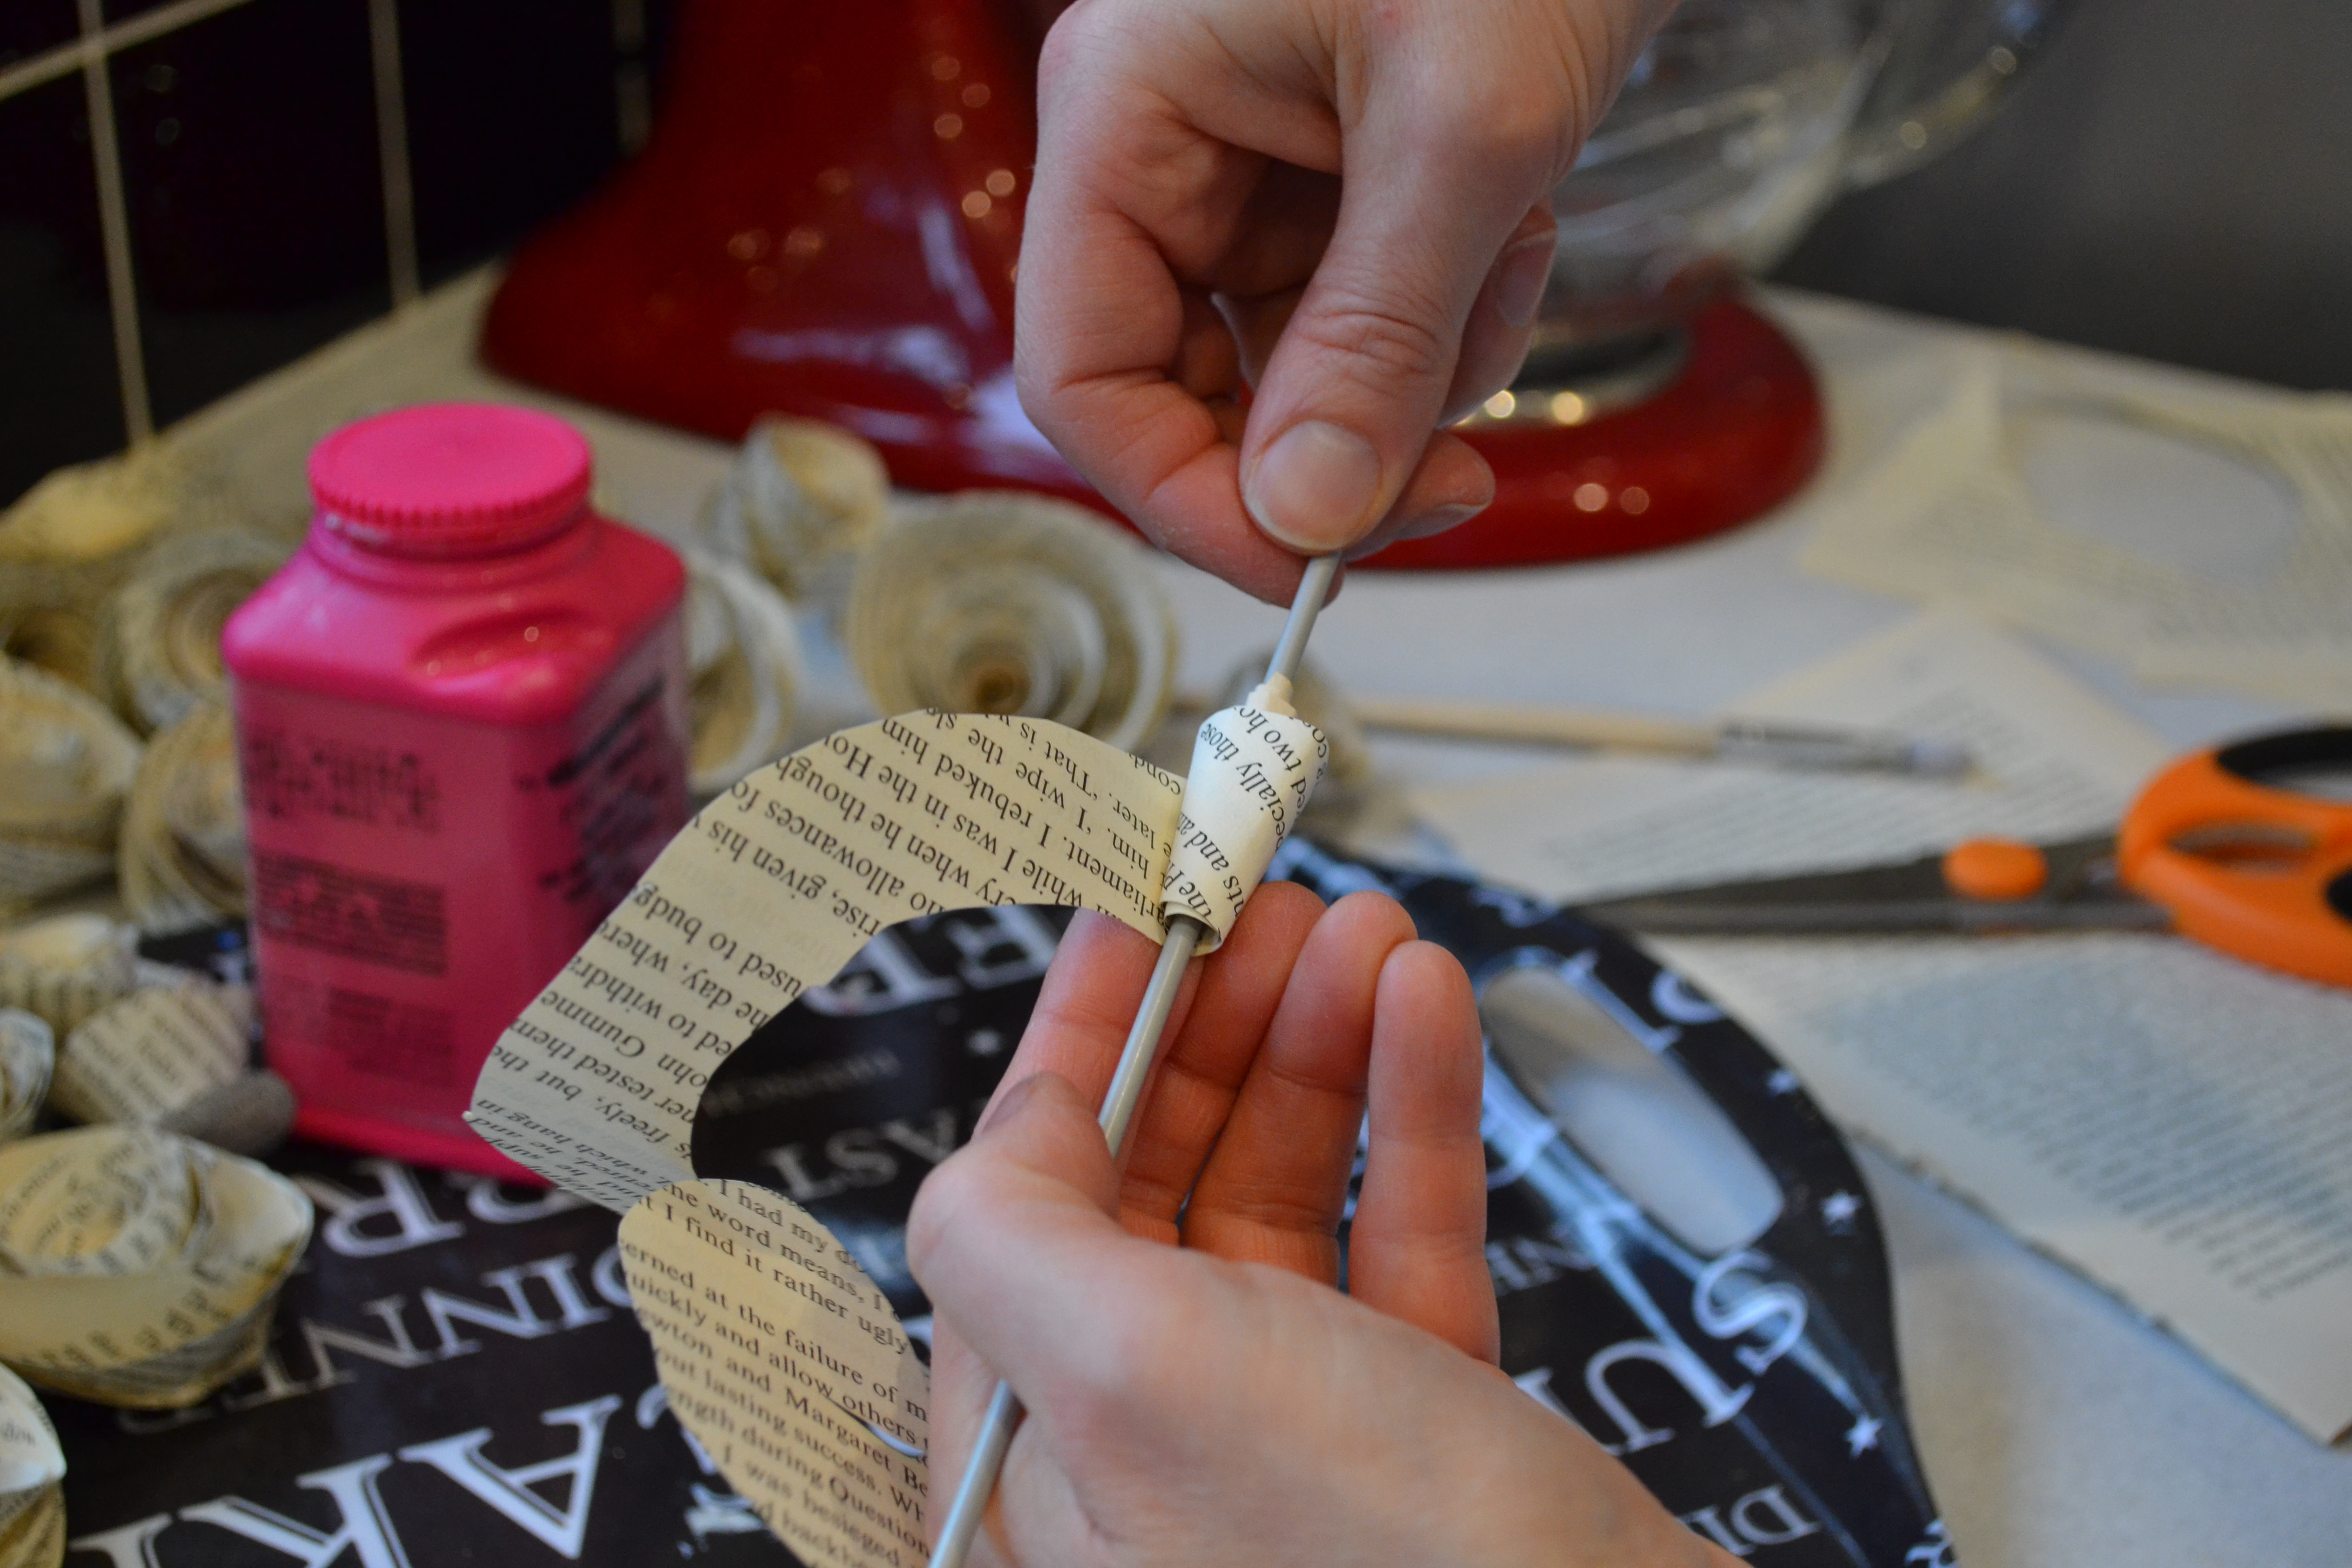
You can experiment with how tight you wind your paper, depending on how tight you want your bloom.
When you get to the end, just let go!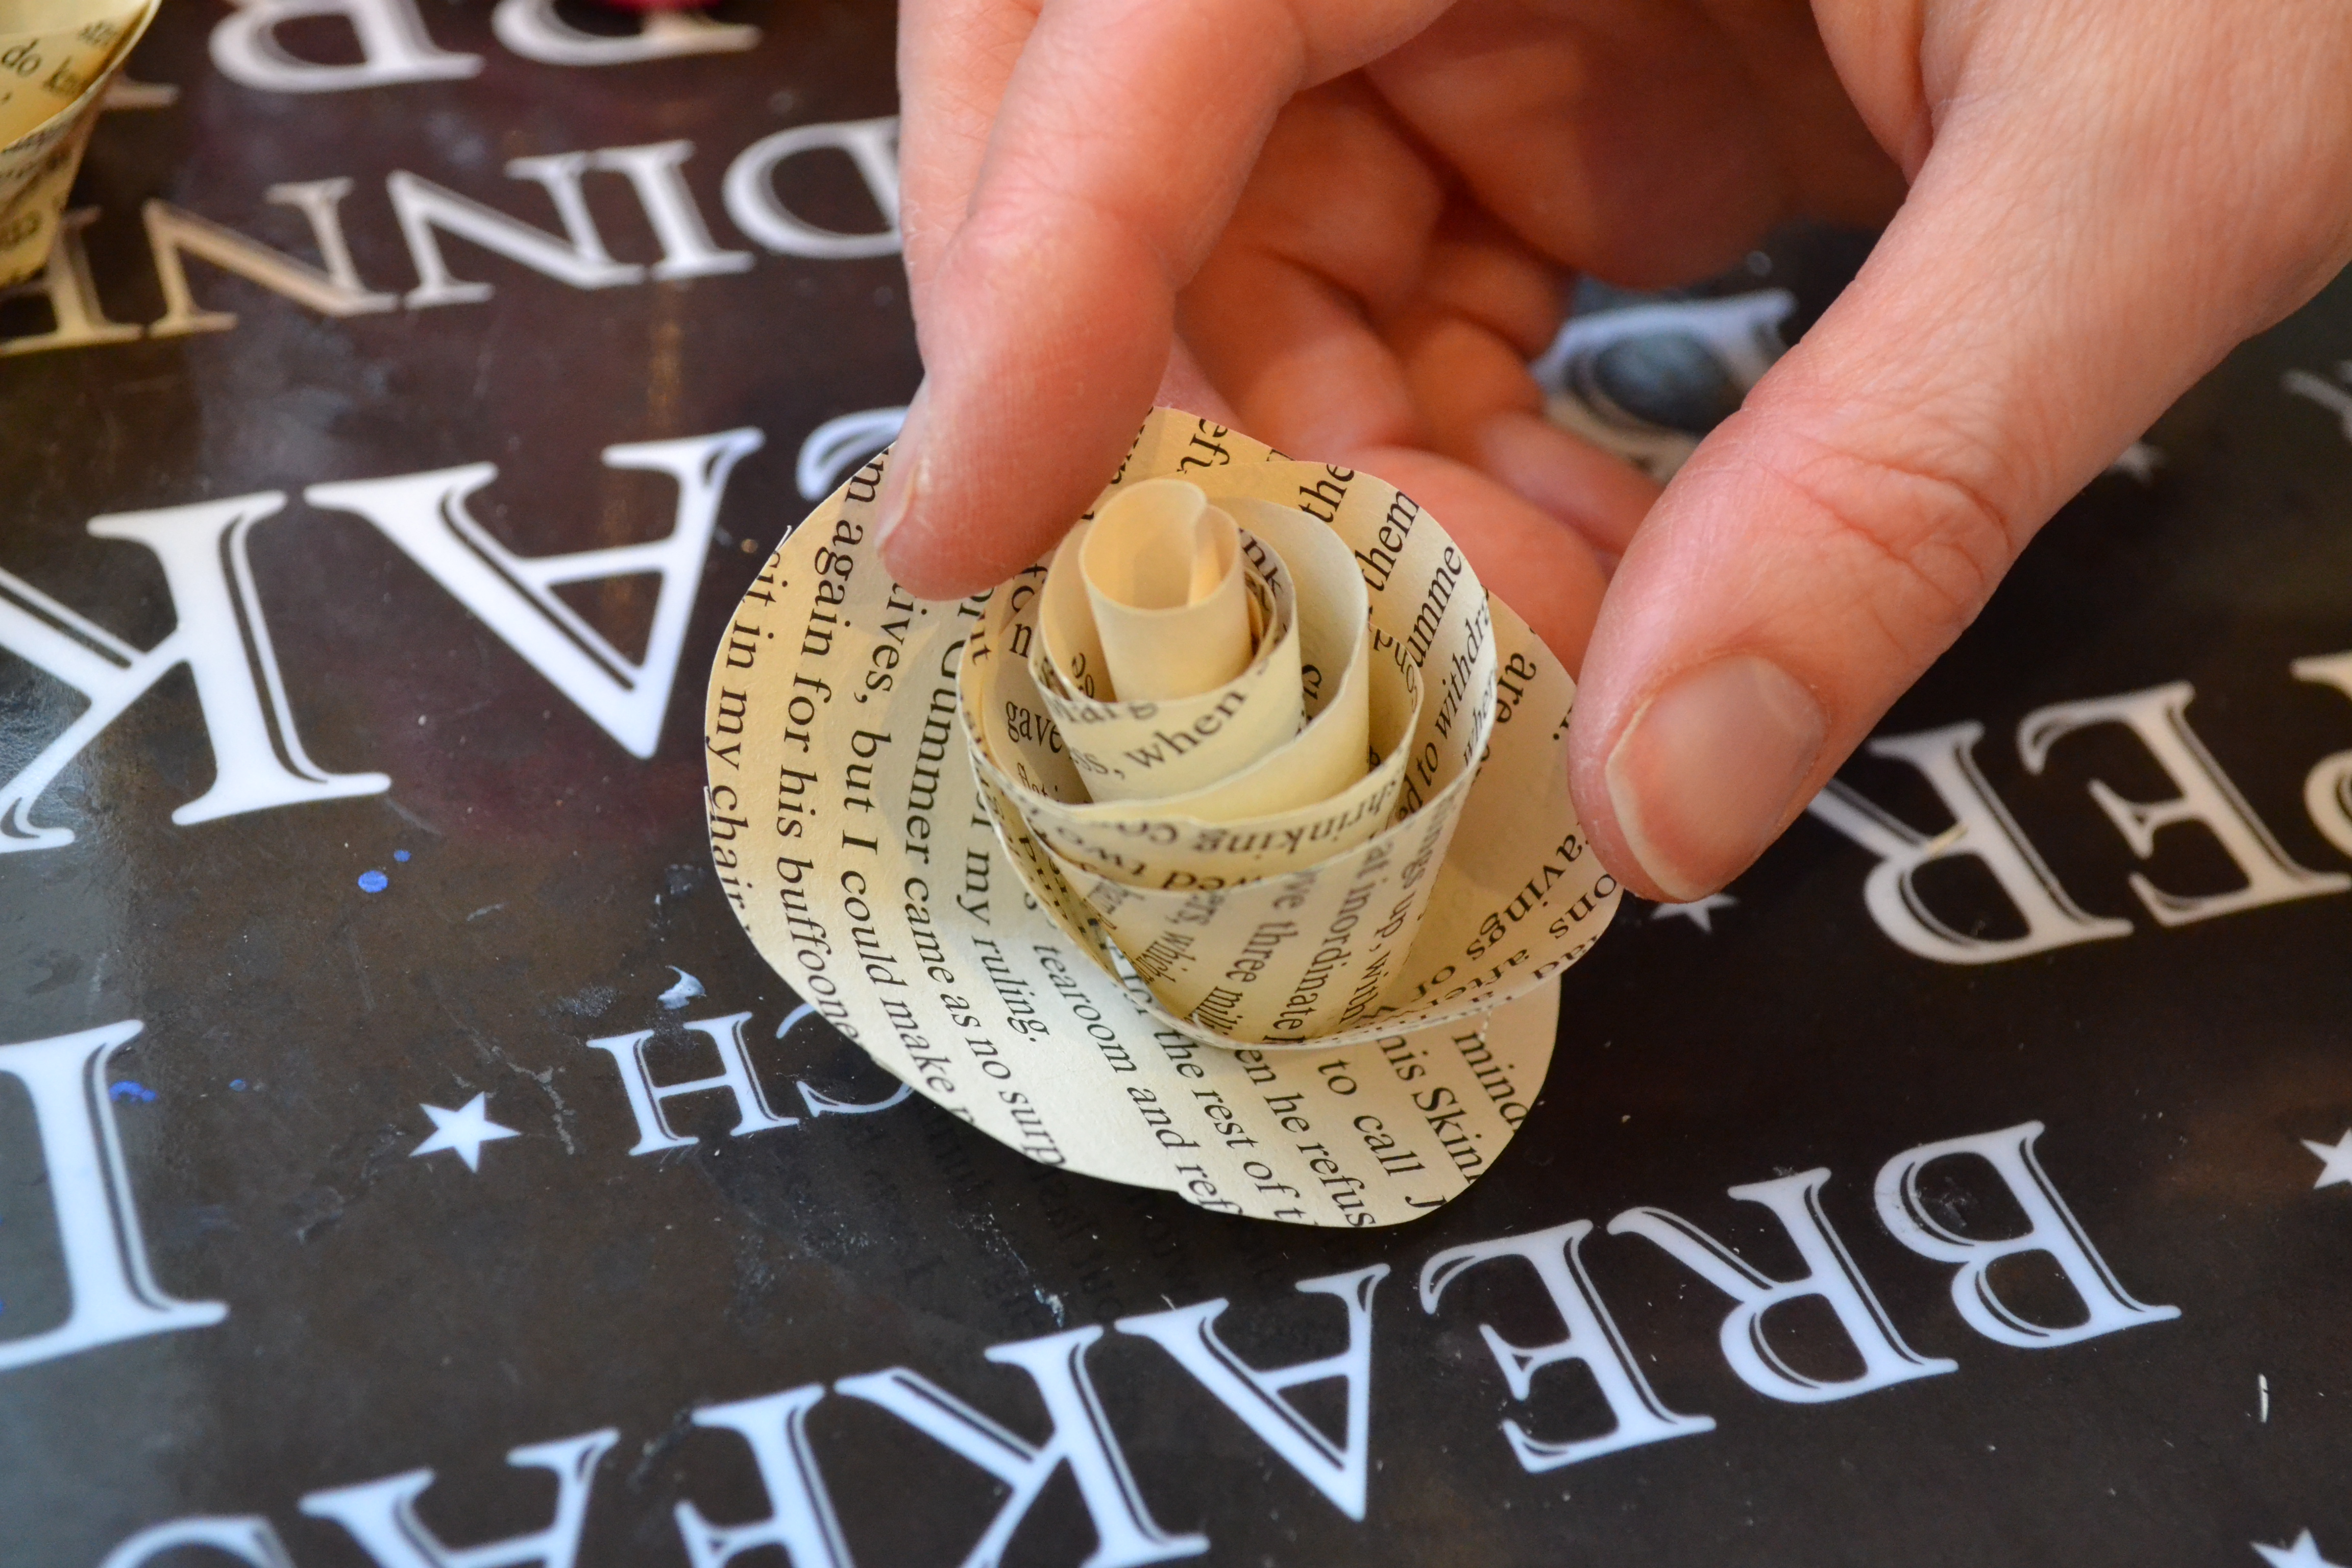
Your bloom will unravel slightly, creating the flower.
We made loads to this stage for a big gluing session at the end.
I’ve seen glue guns used for gluing the flowers but we just used a white paper glue, the sort that dries clear, and a paint brush.
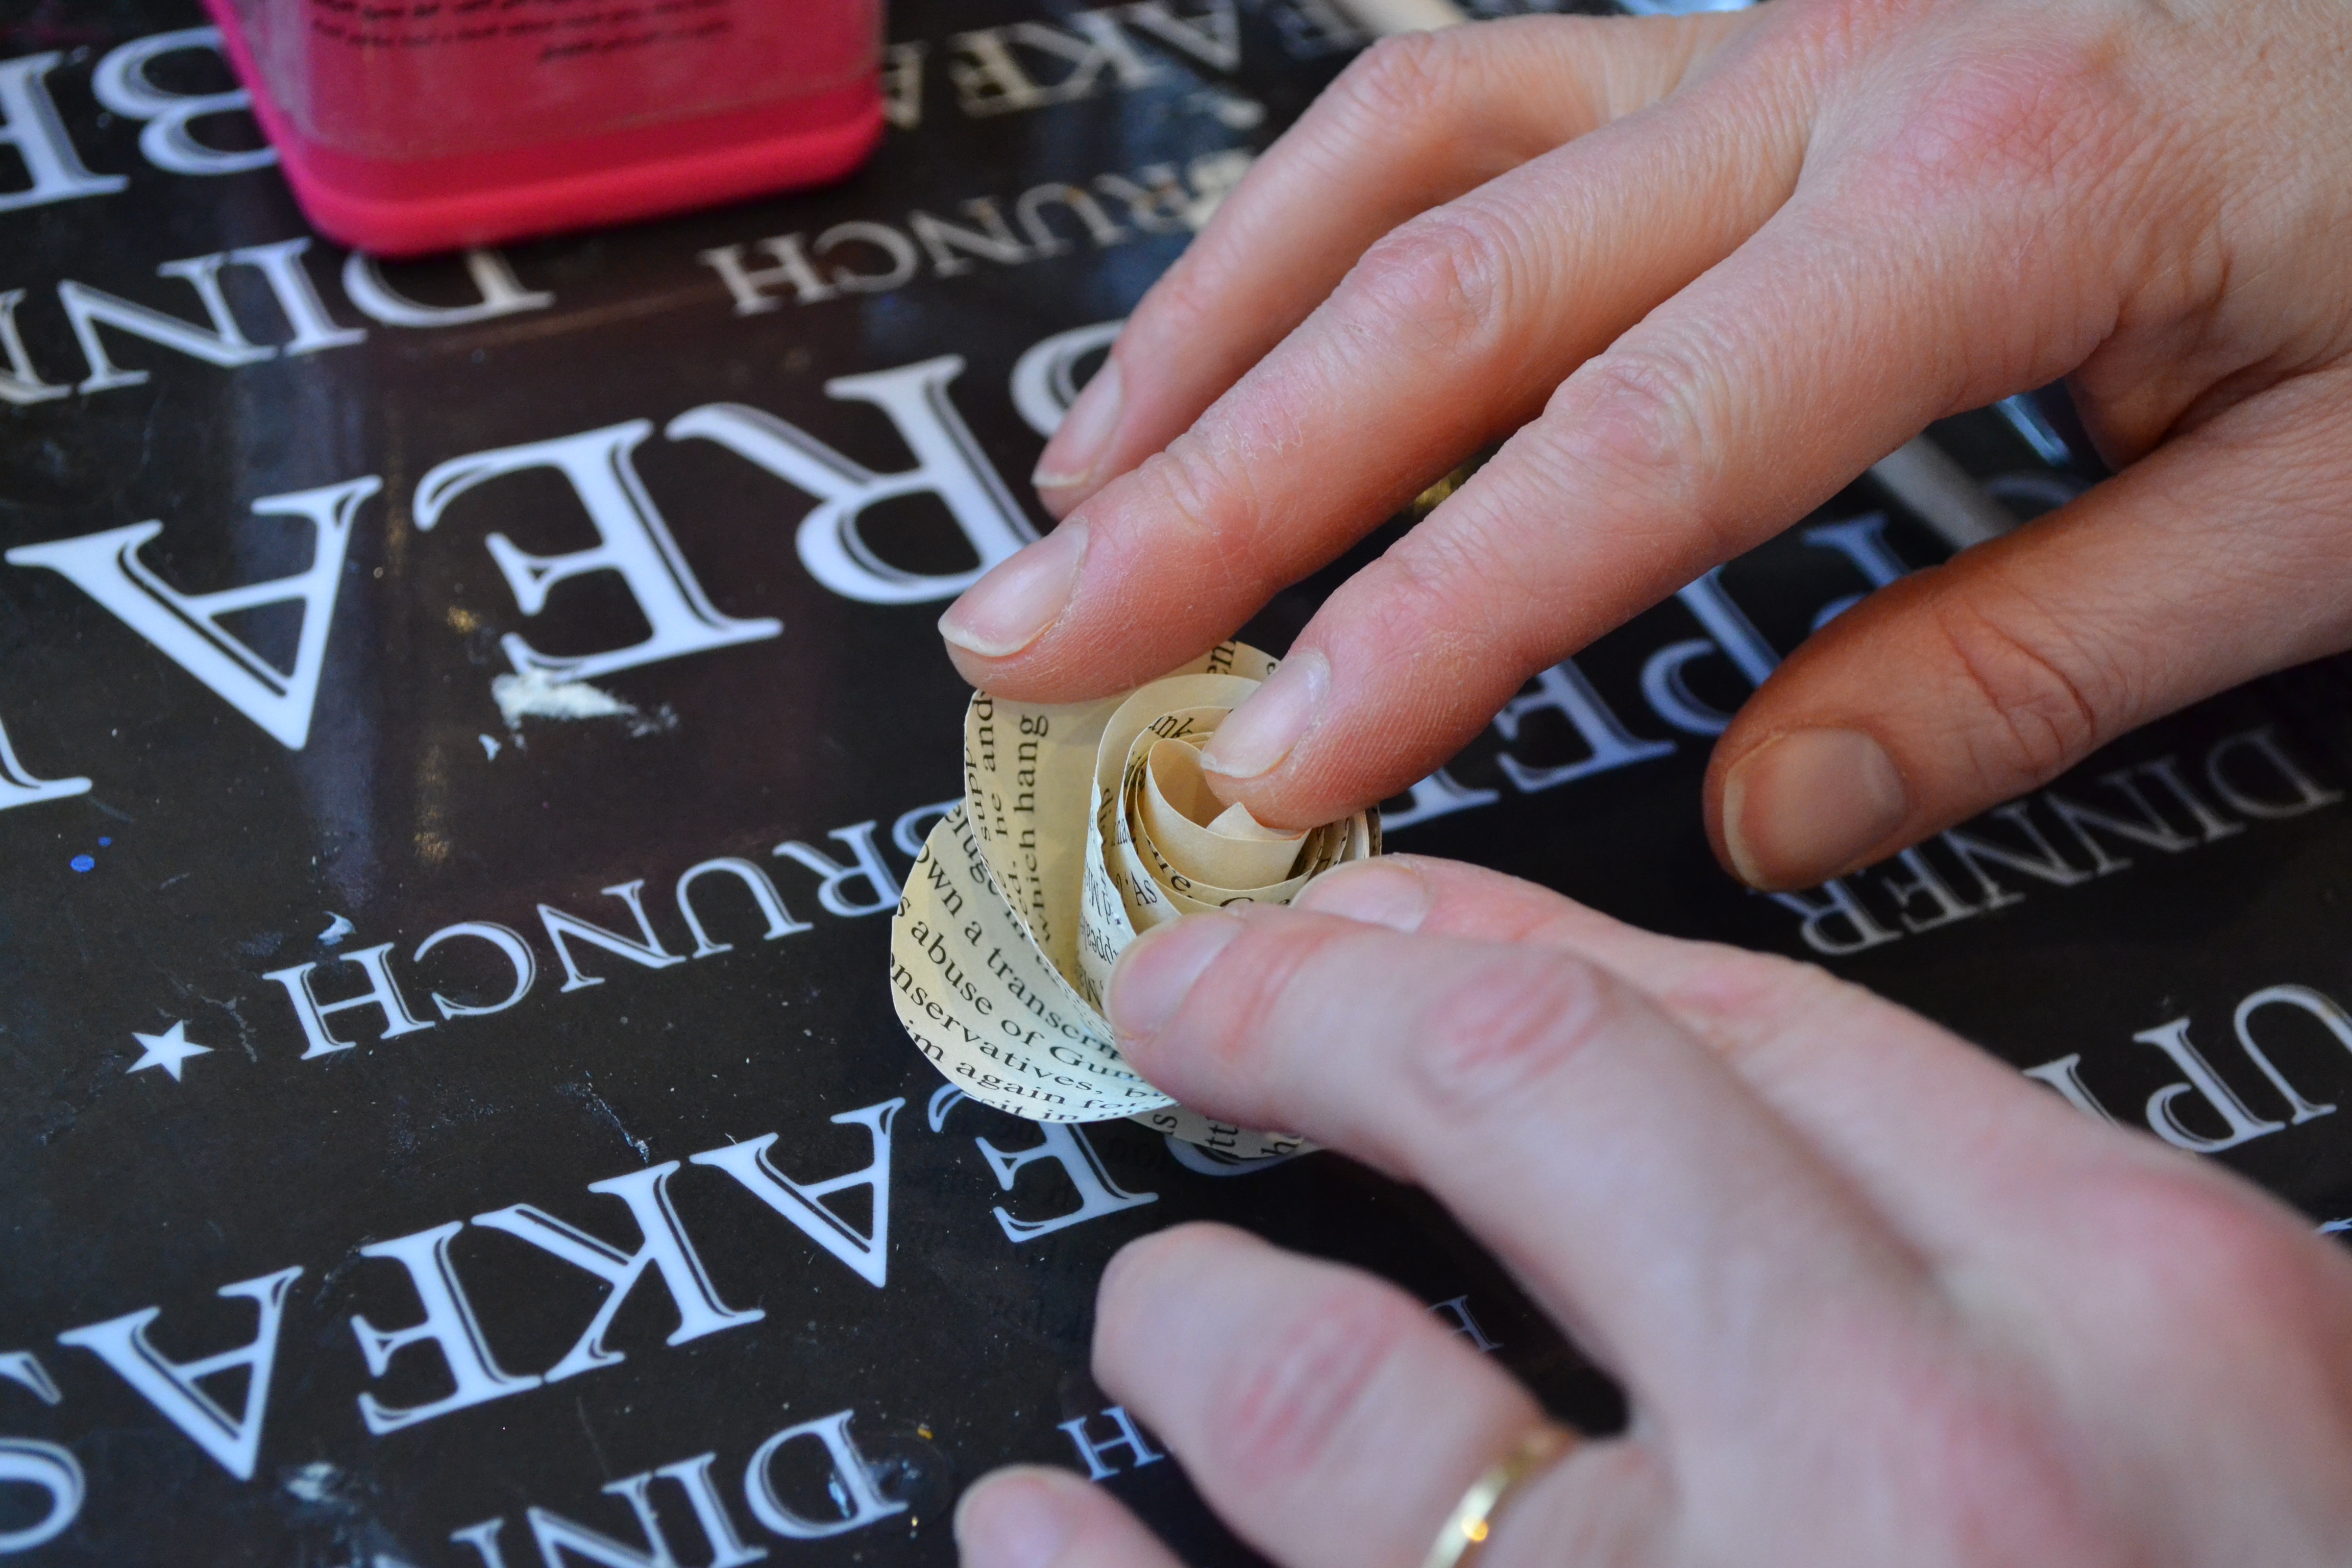
Take your flower and push the centre through with you finger like this.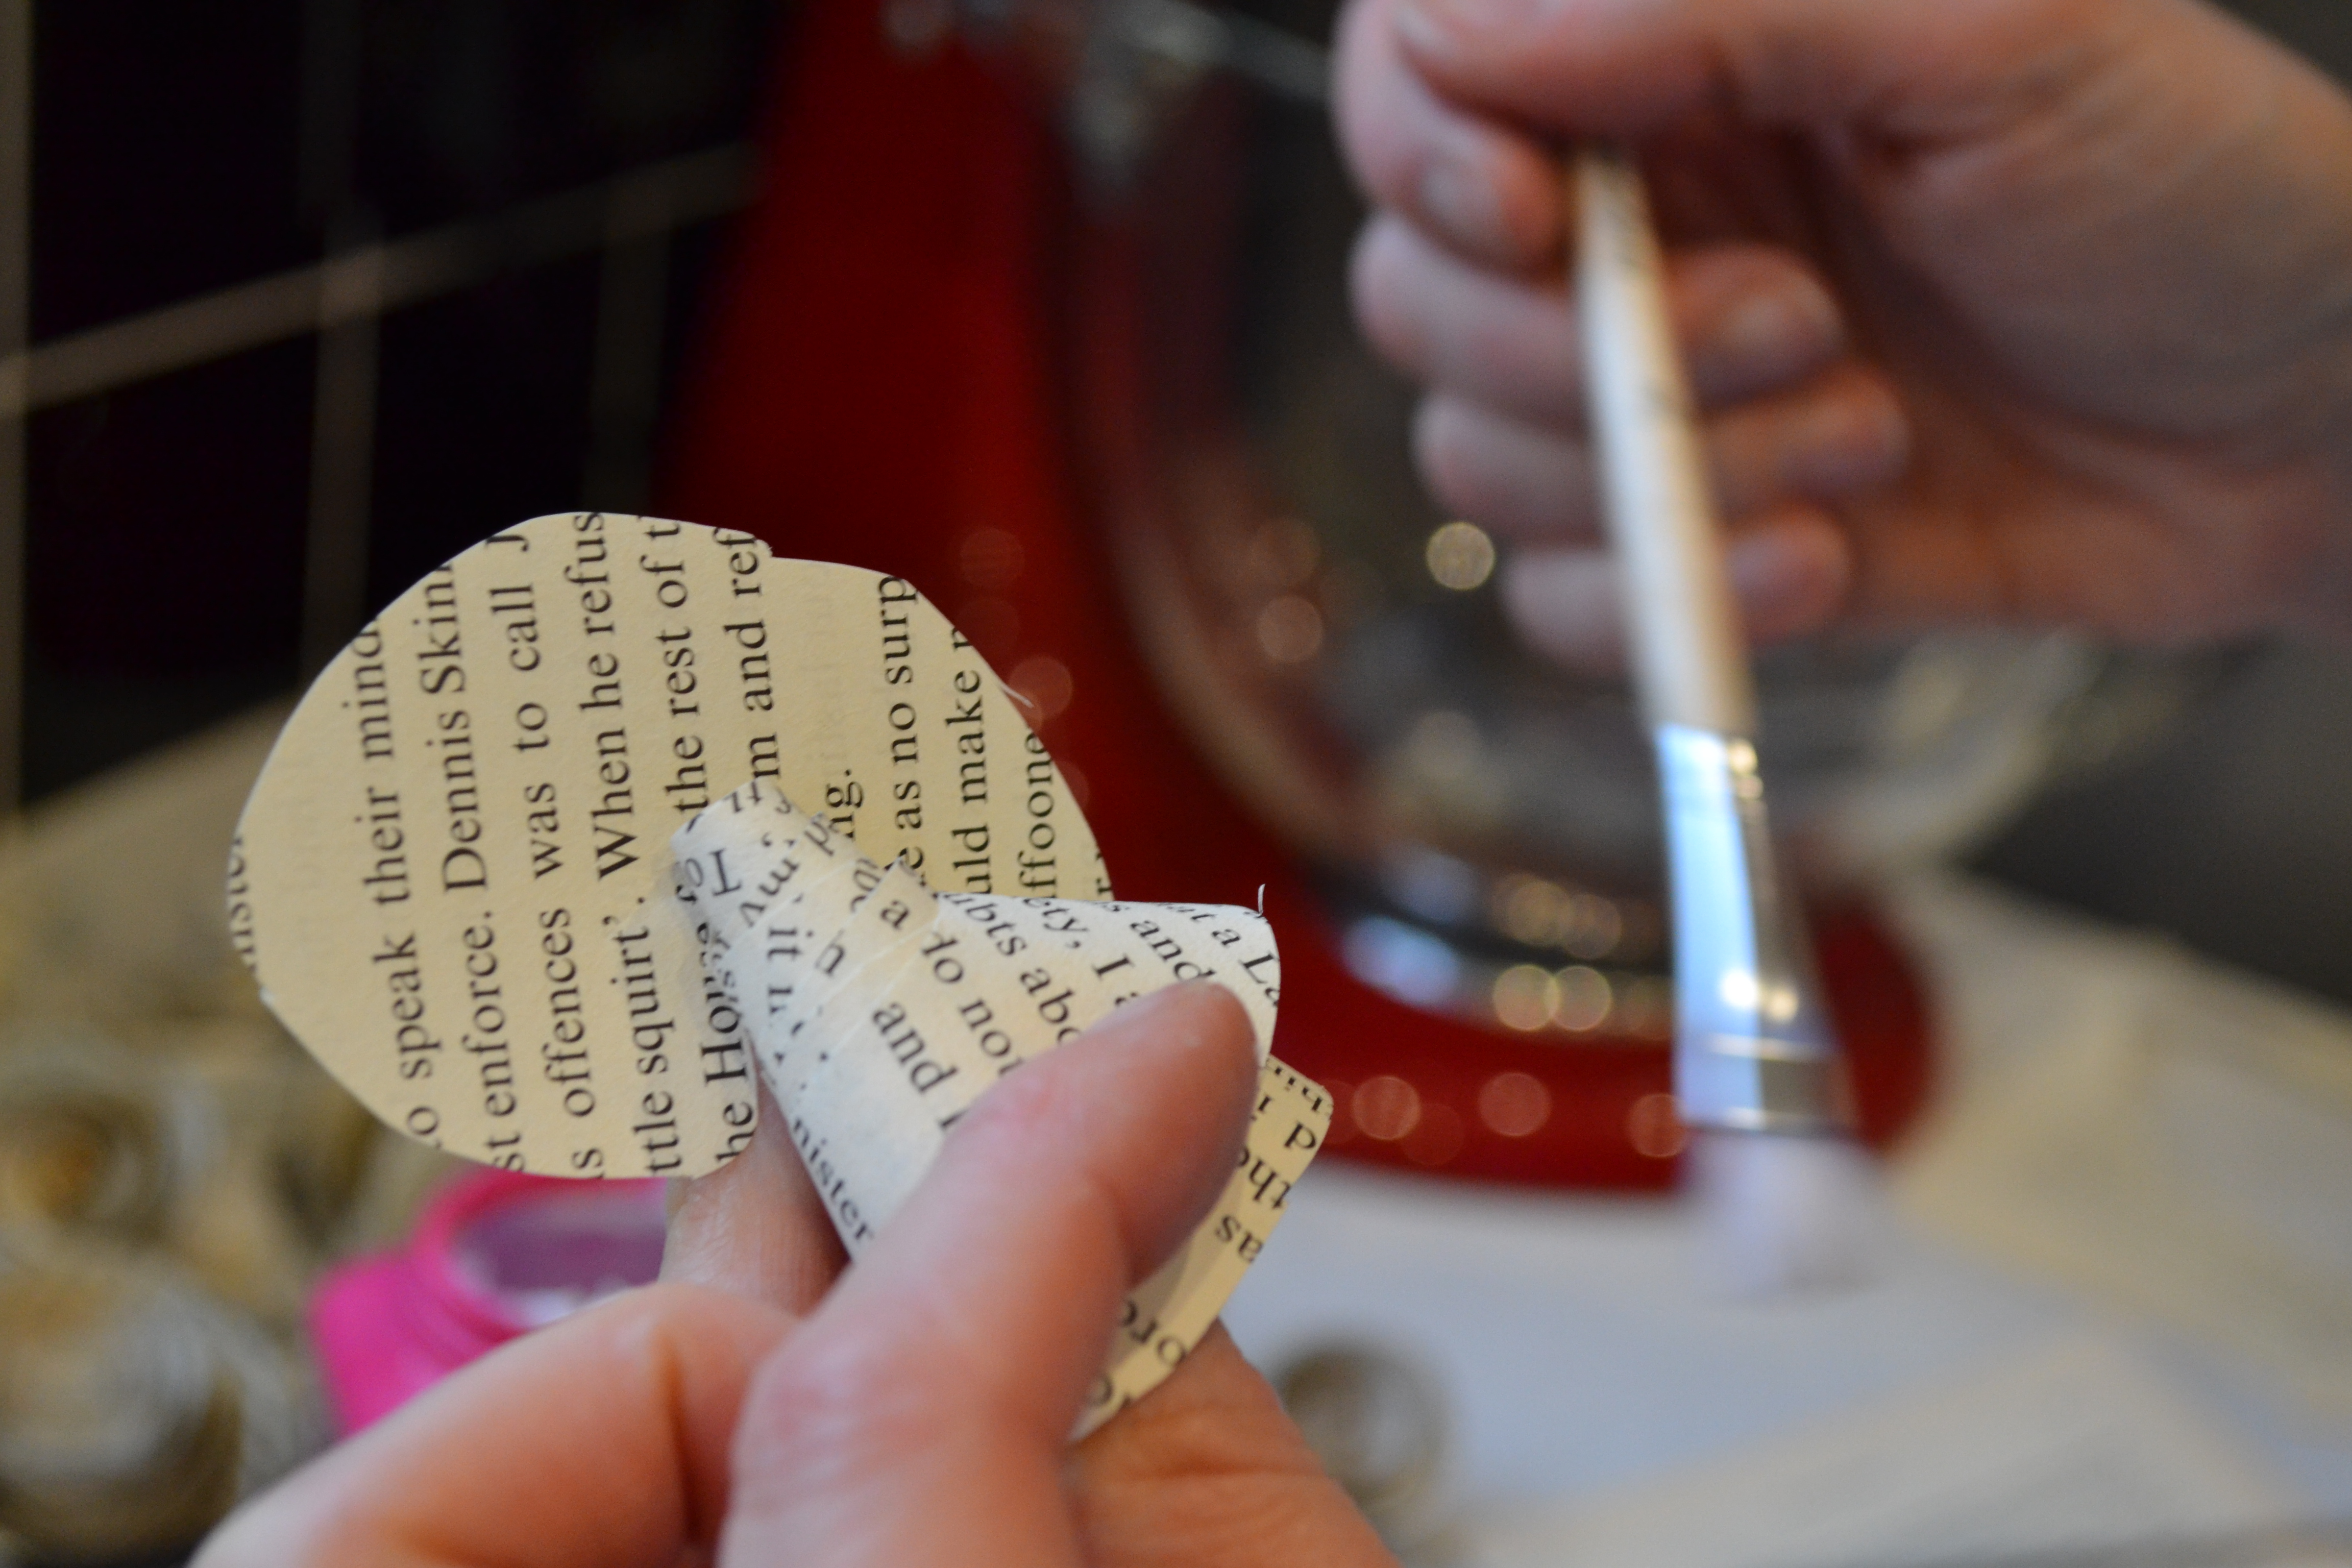
Paint on some glue all around the exposed centre and also paint some on the centre of the disc.
Then push your flower down onto the disc and hold for a few seconds.
We used our old crafting trays to push the flower down on to. It’s a bit messy and you need a surface that you can peel the flower off before it sets hard.
We also painted some glue in between some of the ‘petals’ and pushed the centre of the flower to one side to give them more of a natural appearance.
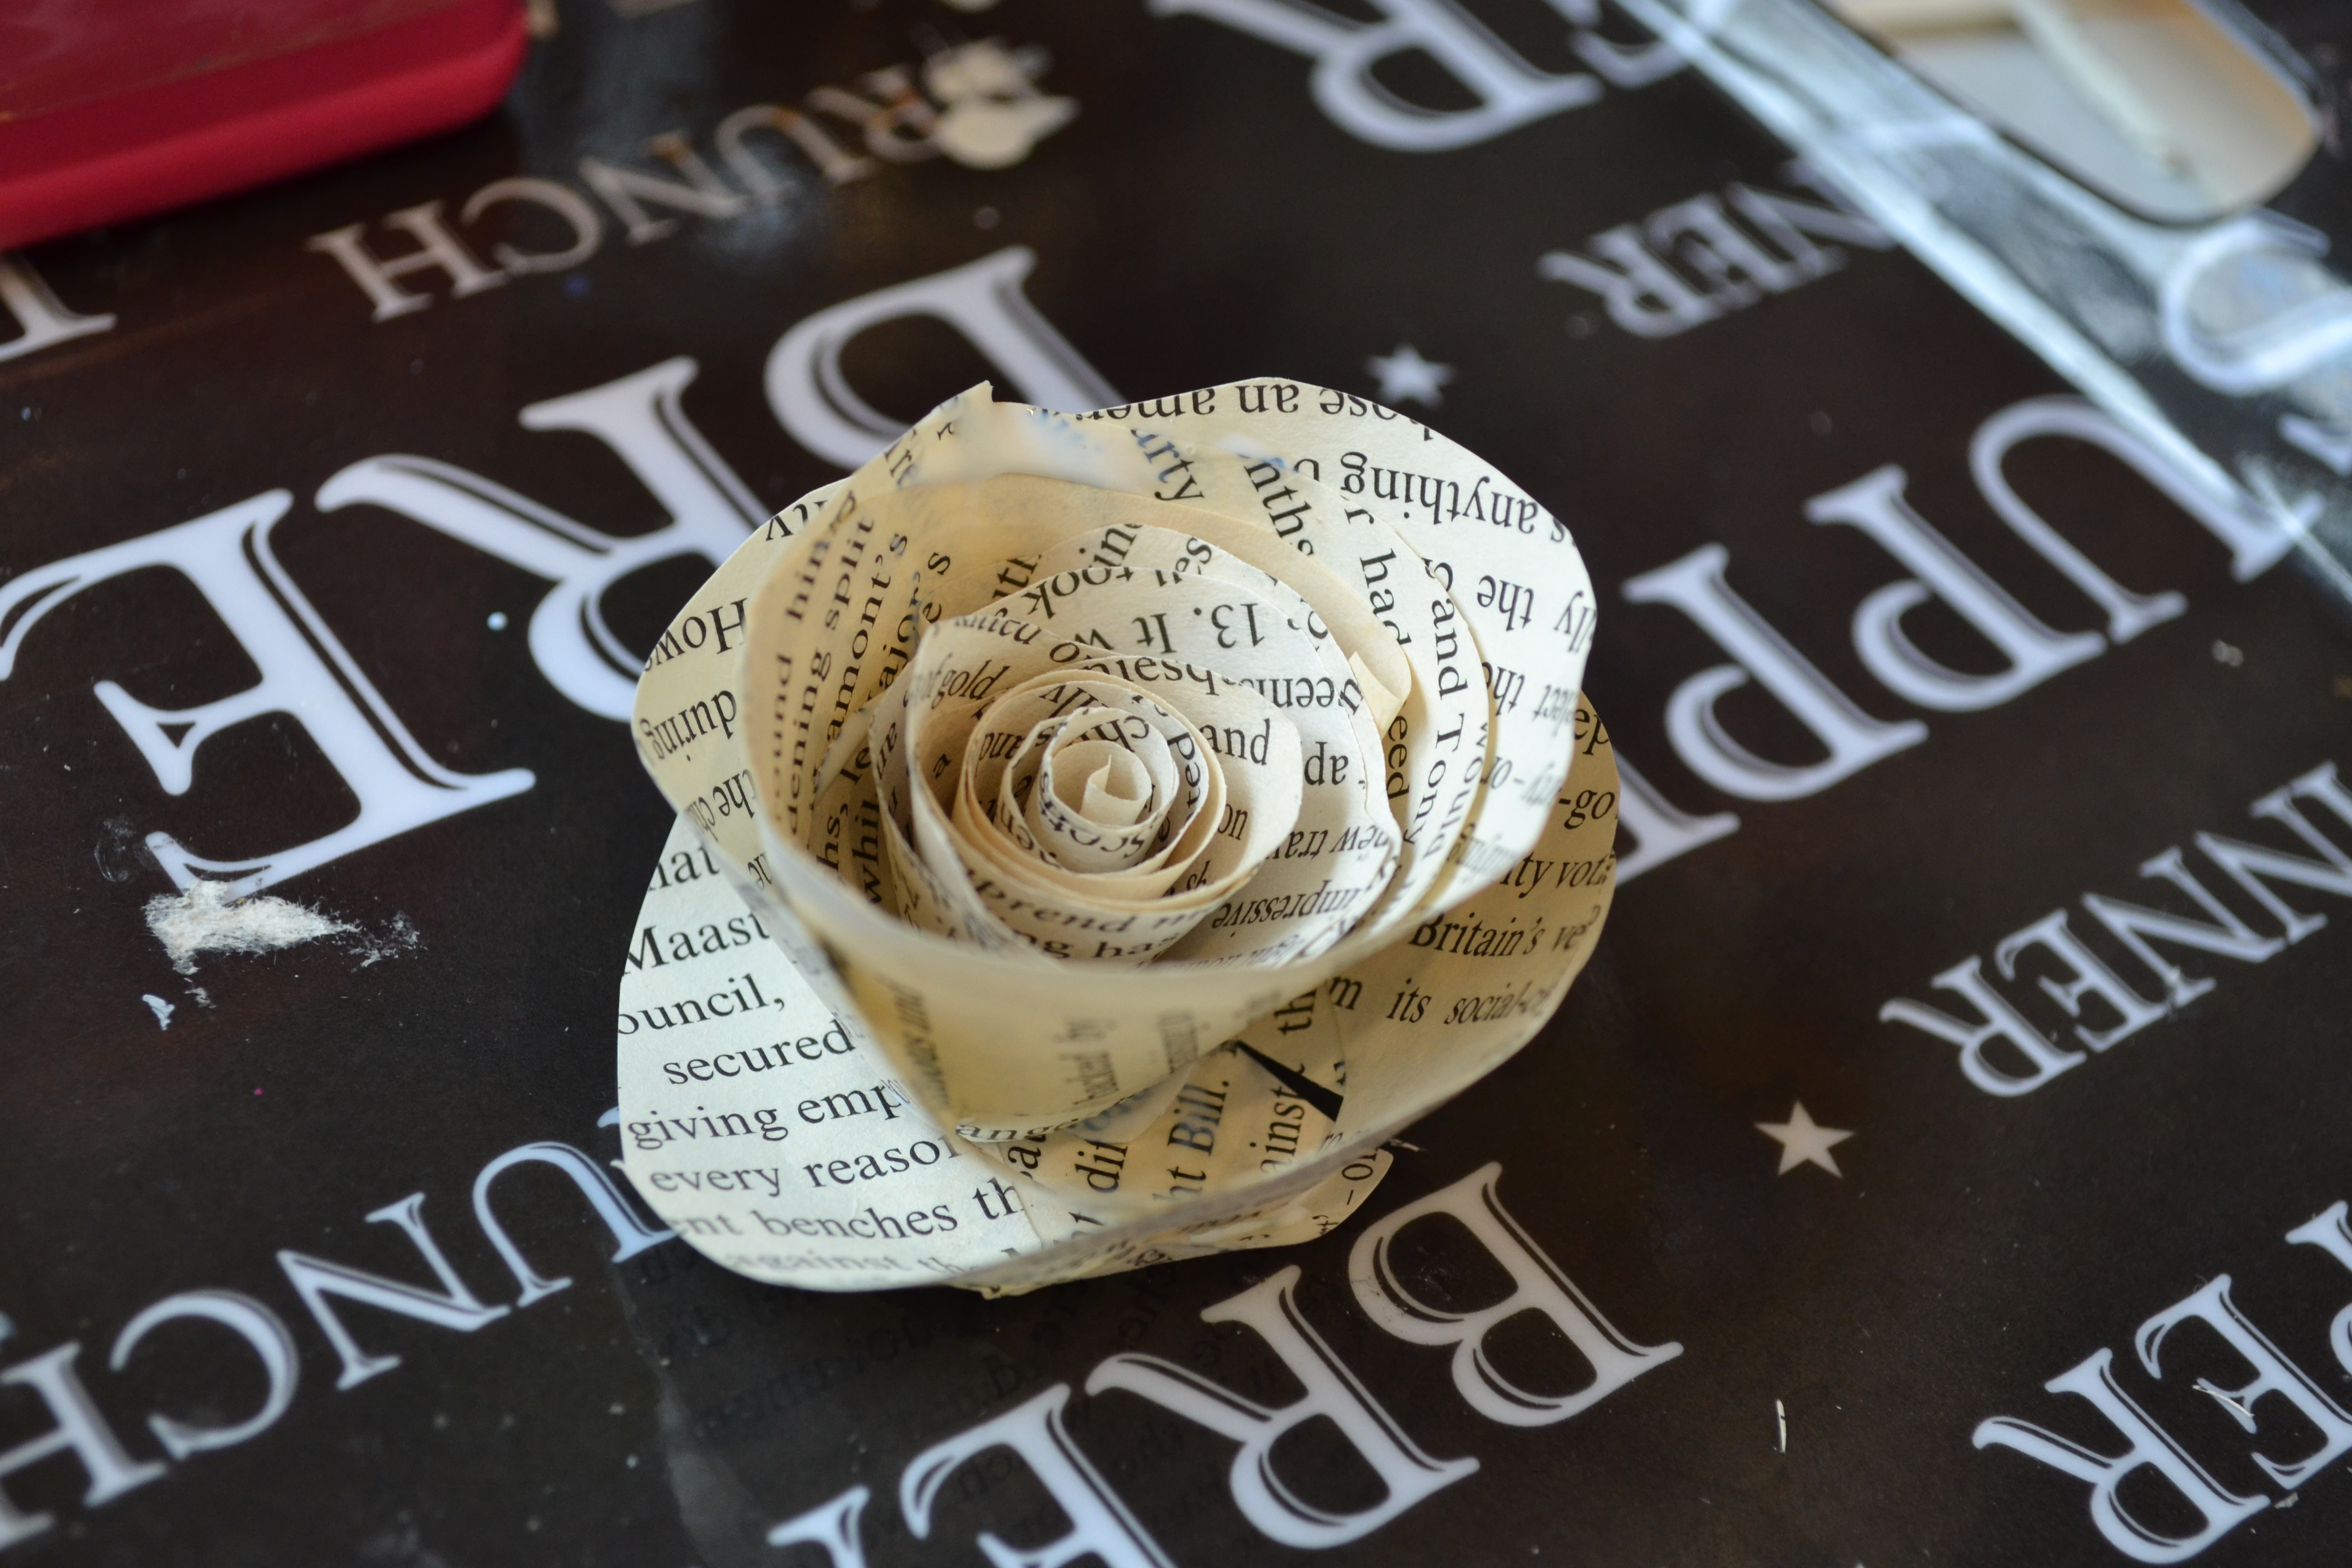
After a couple of minutes, nudge the paper flower off the surface and turn over to dry.
A lovely simple bloom.
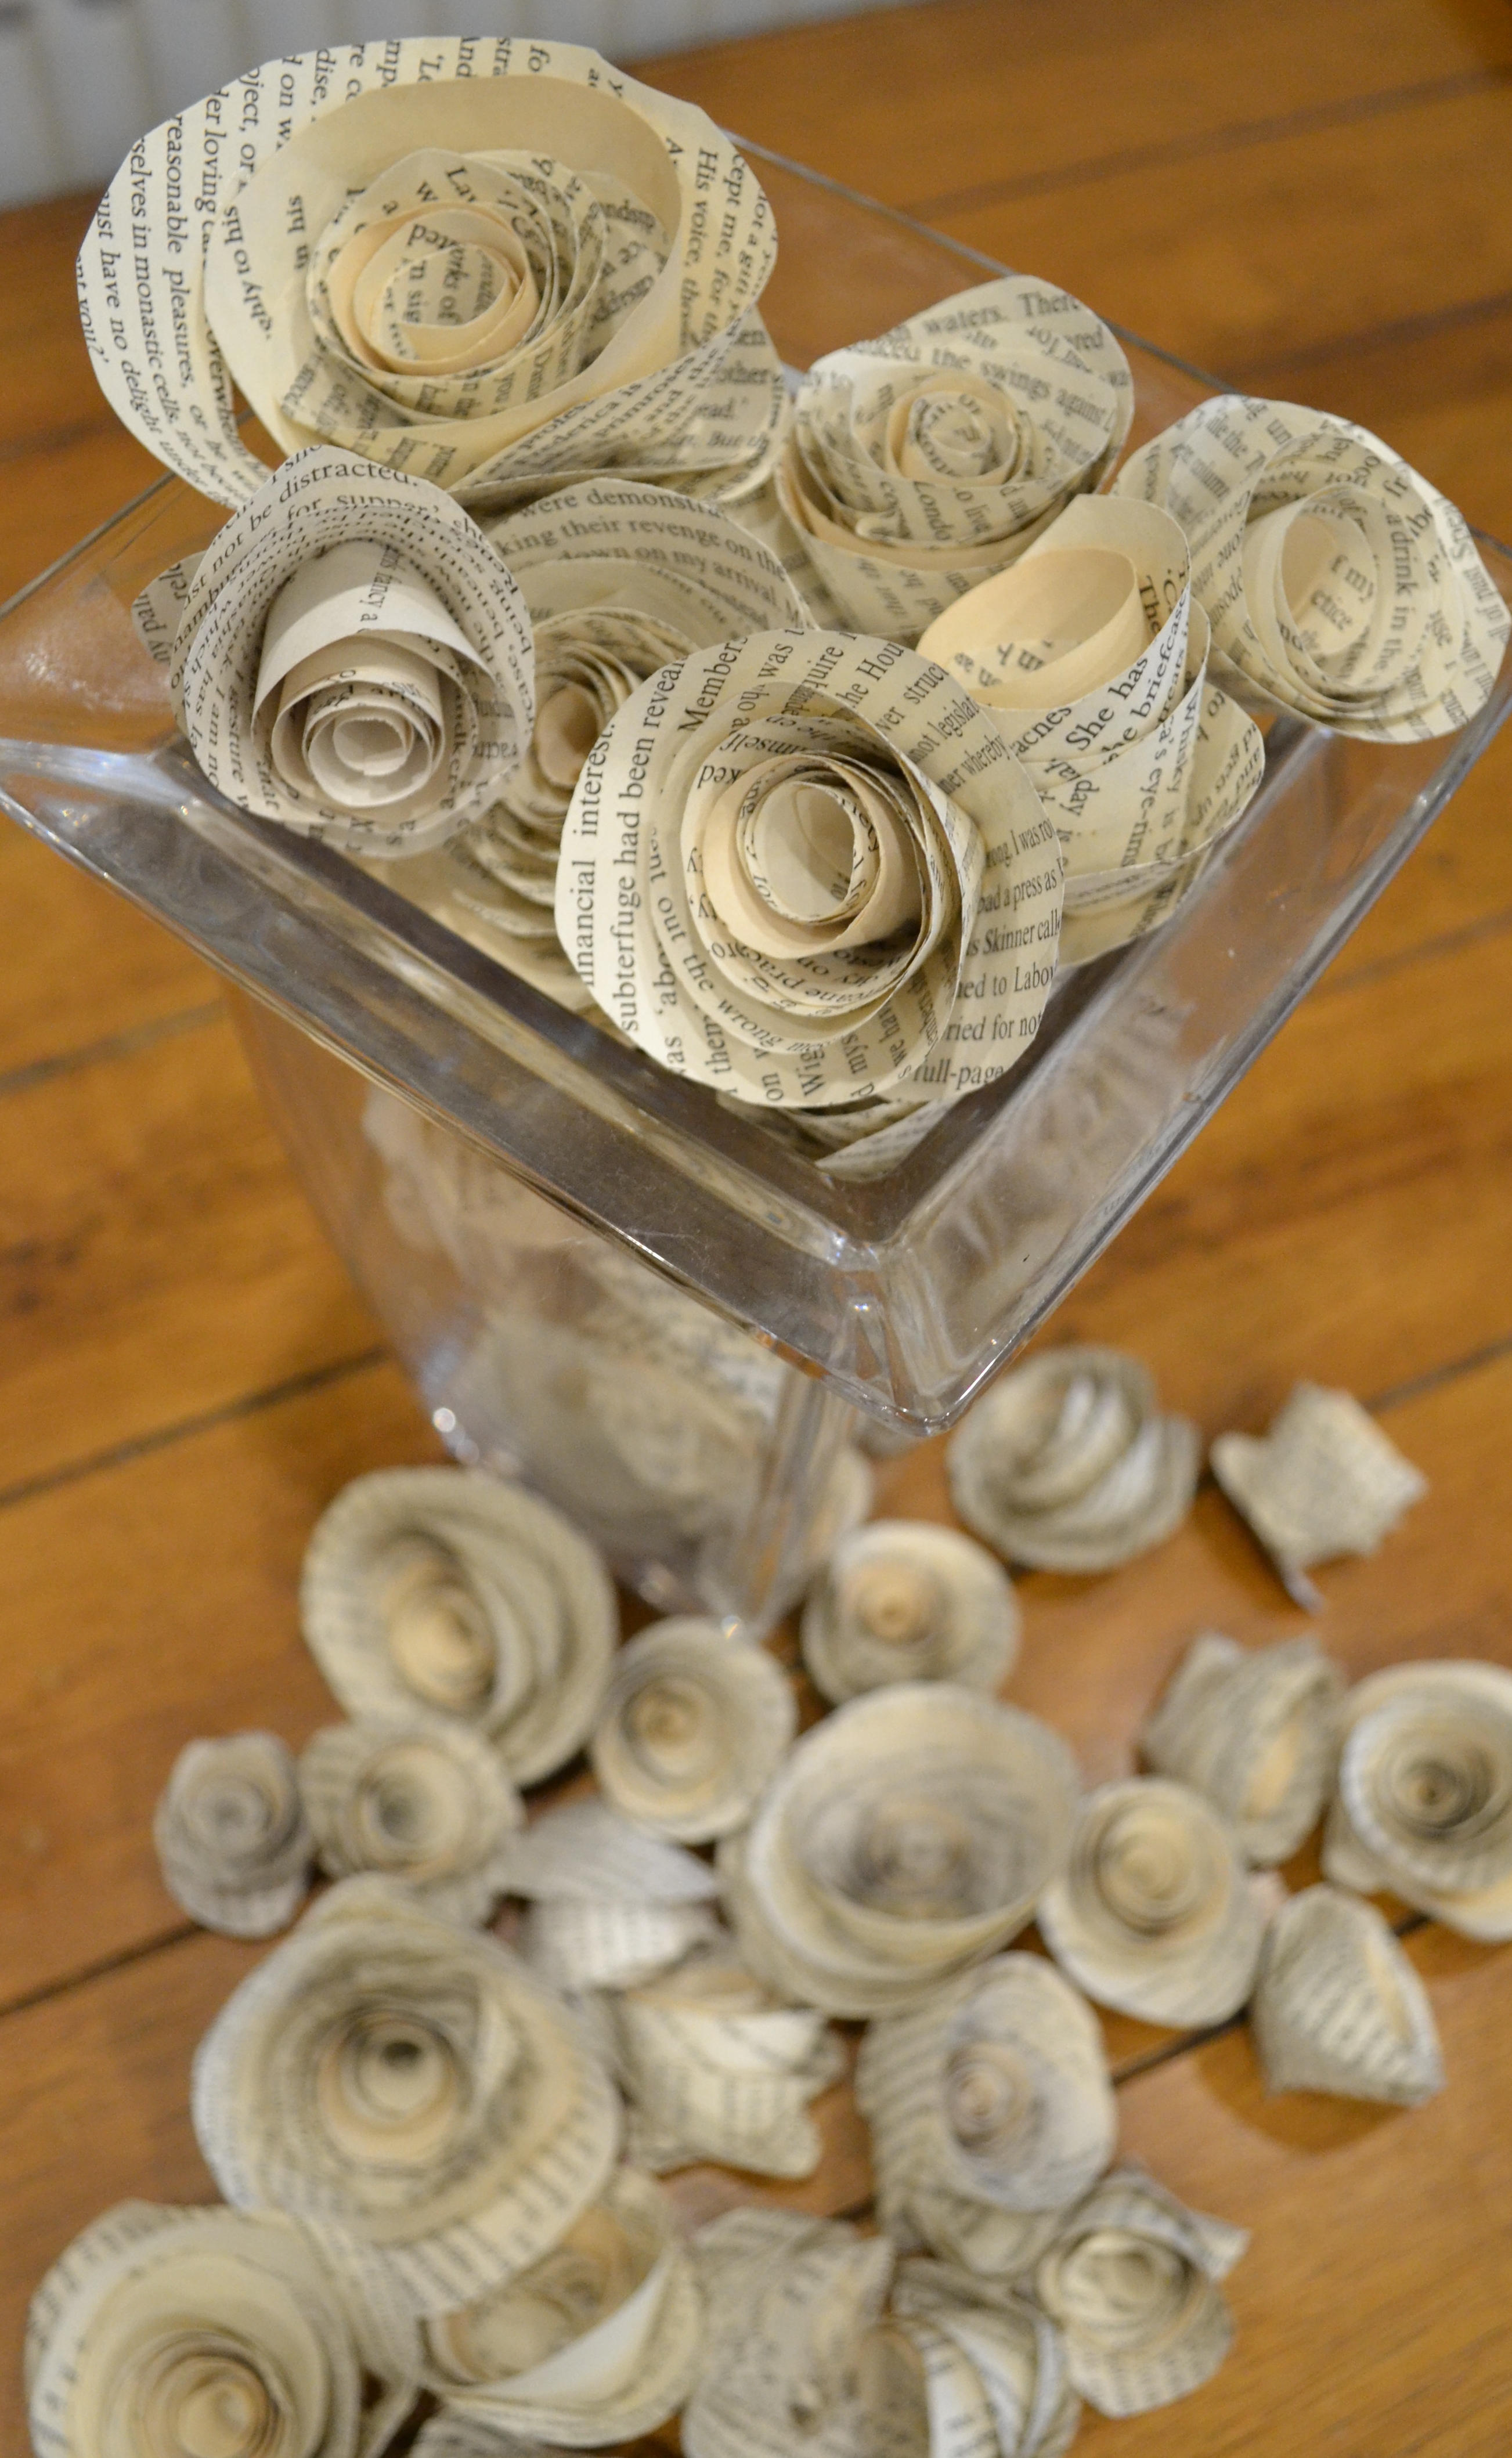
For what I had in mind I also needed some larger, fuller blooms.
Using exactly the same method we round up some spirals of paper but more loosely this time. Arrange and glue the flower leaving a large round space in the centre. 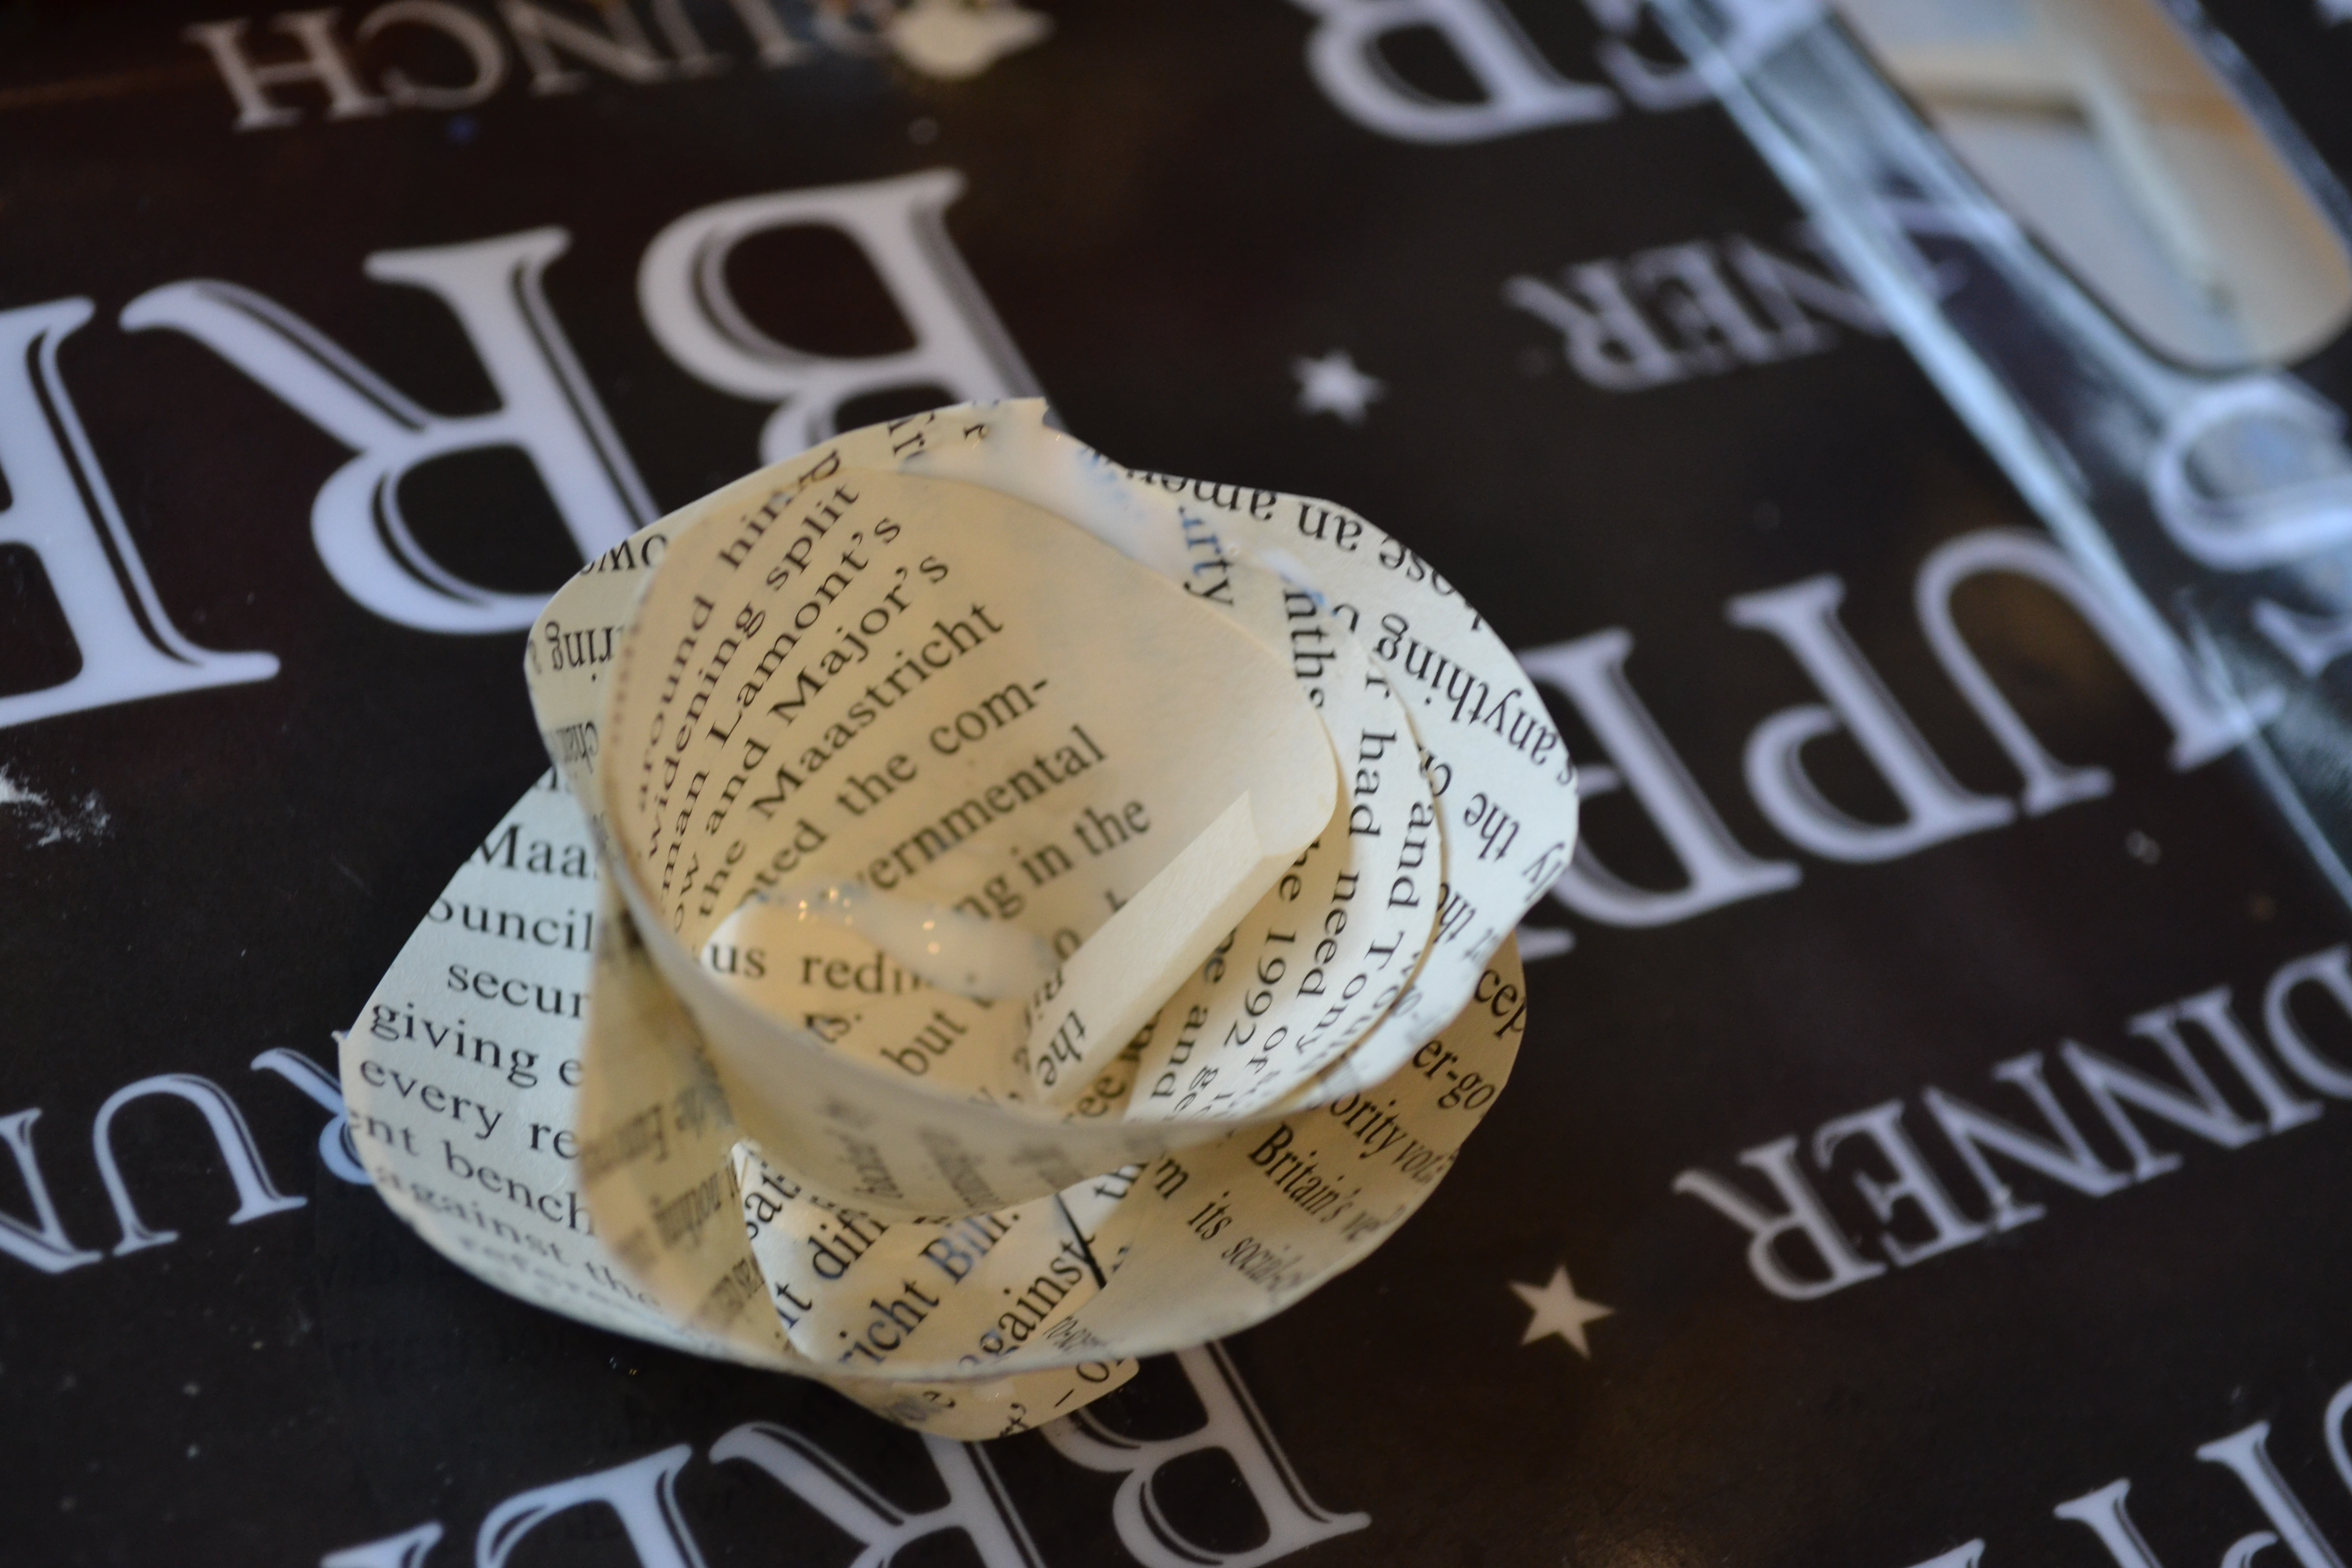 When dry simply glue a smaller flower into a larger one.
I think you could also use newspaper but I’ve yet to have a go. The pink pages of a Financial Times would look good.
Ultimately I will stick these onto wire stems for uses in various arrangements I have planned for the BIG DAY.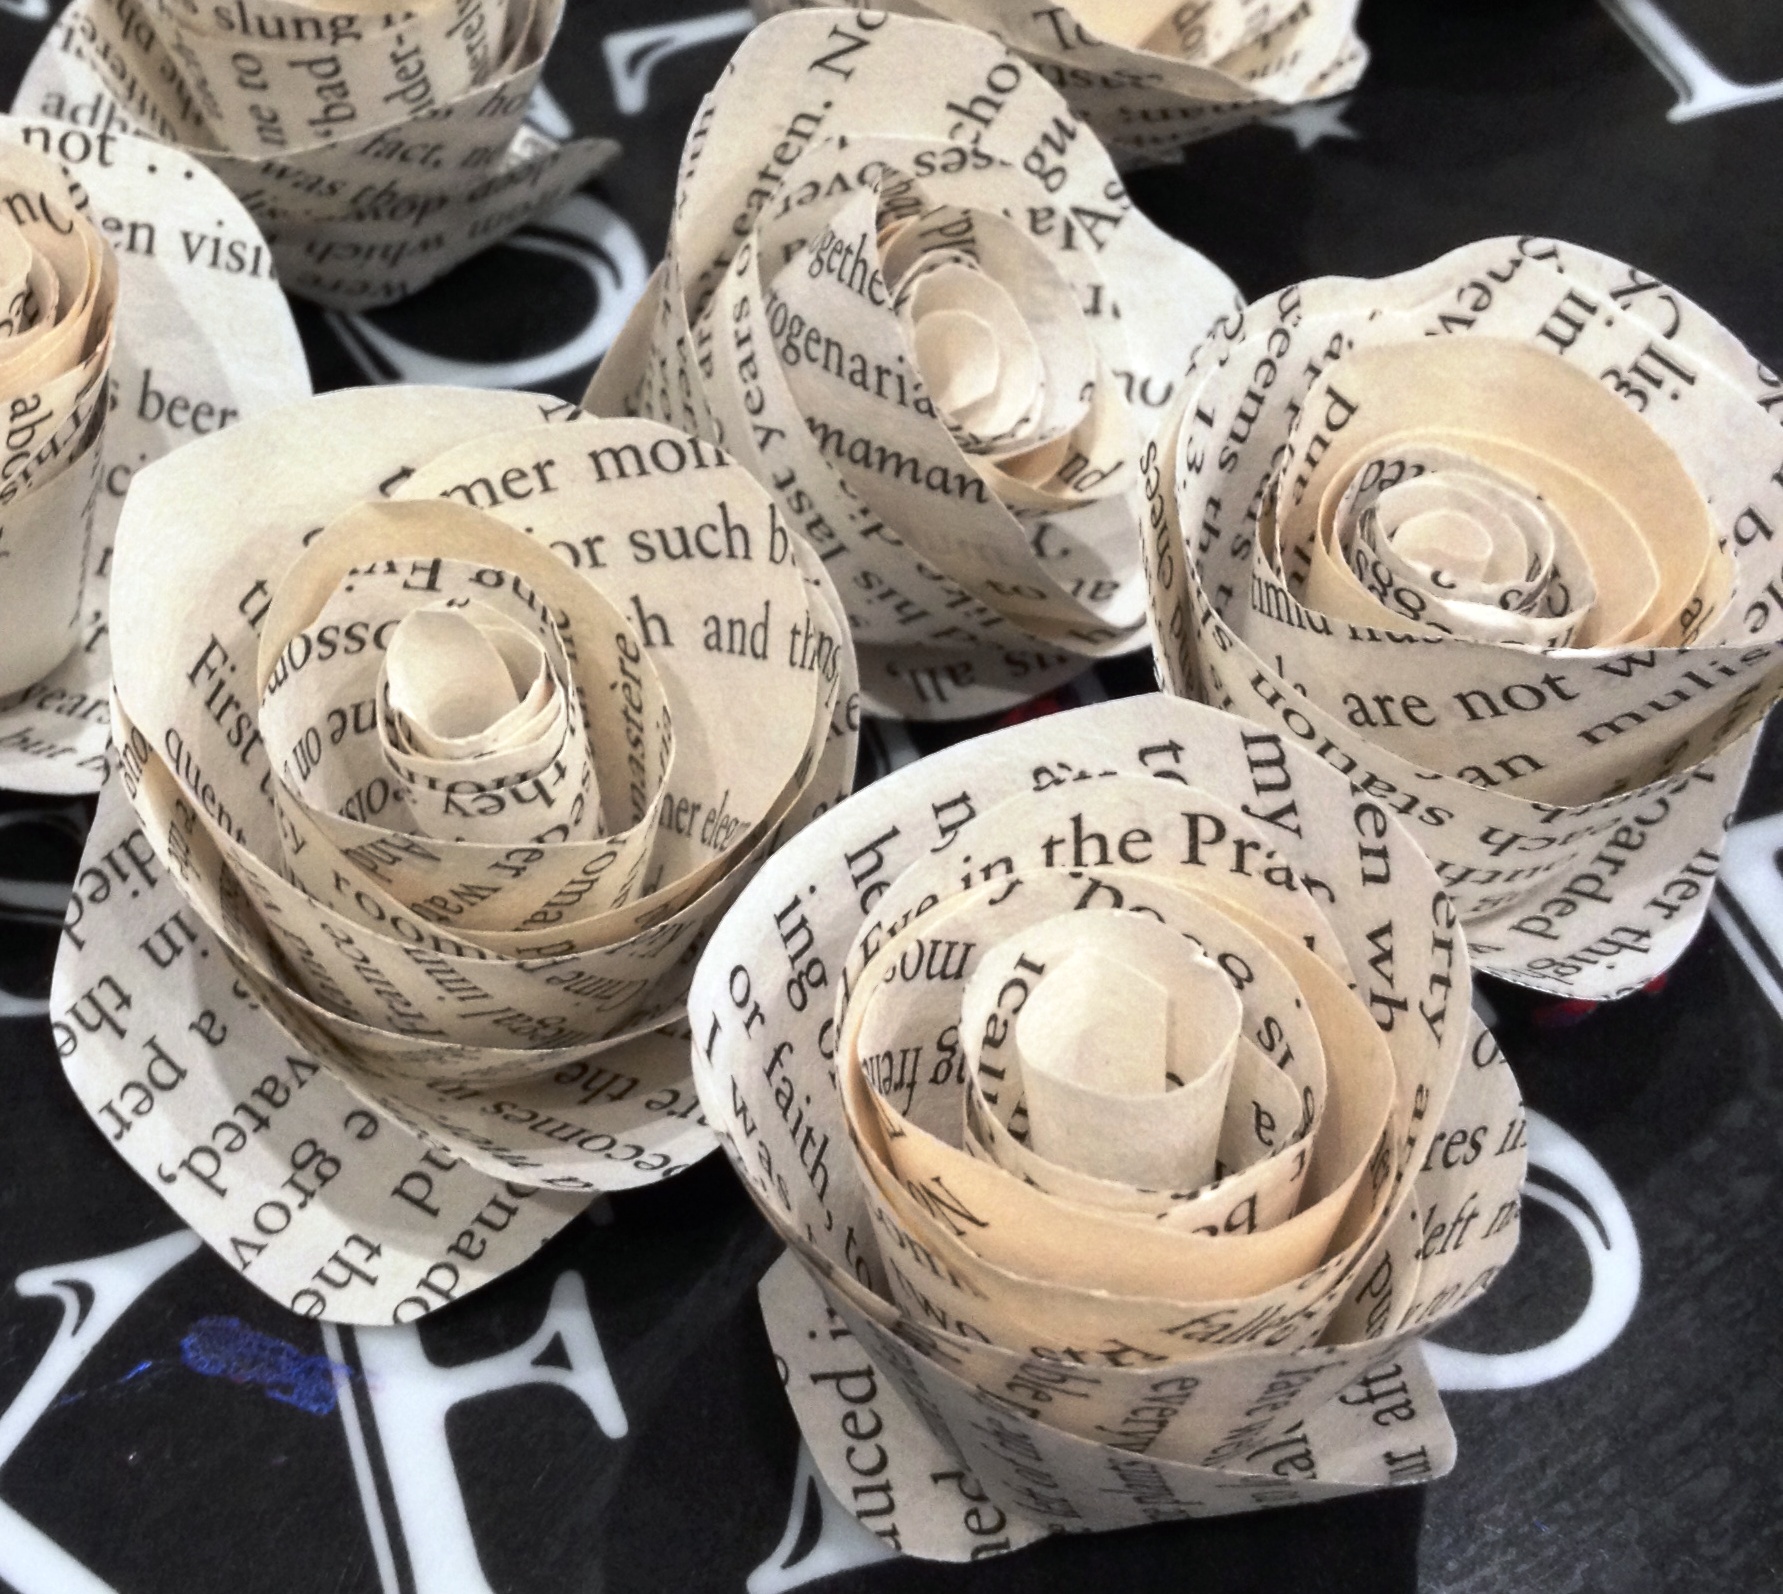 I also plan to add some pearl effect beads to the centre. But meanwhile, they look lovely in this.
Love, Lucie xx

Yay! Thanks for posting this lovely tutorial! I think I’d like to make a little bouquet for my dining room table.
LikeLike
I’ve seen lots of ways to use them on Pinterest. I’ve ordered some florist wire to give mine stems. I was just going to loop the end to make a decent anchor point for the glue but probably use the glue gun for this.
LikeLike
They are lovely and so nice made of printed paper. Hope you have a good week.
Jill, Christmas Pie Crafts
LikeLike
Thank you. A busy week as always. Not enough hours, too many things to do!
LikeLike
Those are gorgeous!
LikeLike
Thank you! I was thinking of making some out of coloured (!!!!!) paper as well, just to give a bit of relief.
LikeLike
I love making paper roses like this and regularly show customers at work how simple they are. They look great made from your book pages.
LikeLike
Thanks. I was going to try some with separate petals next. I have some big arrangements in mind using a combination of paper and real flowers.
LikeLike
COOL! – But I’m wondering if using magazine pages would work as well..? – I’ve got a stack of old “decor” mags looking for a purpose in life other than the recycle-bin!
😀
LikeLike
I think that would look great. Especially if you were able to focus on pages that were predominantly one colour theme or pattern.
LikeLike
Good idea to use an FT. I might get Mr. T. to bring one home and give it a try.
LikeLike
I think I might too, just to add a bit of variety.
LikeLike
So effective!
LikeLike
I have many, many more of these to make over the next few months!
LikeLike
OK, you are genius. I got a Cricut flower shoppe cartridge for Christmas, looked online for tutorials, etc, and still could not figure out how to make it all go together. Your very clear, simple explanation makes it all make sense! I will go back upstairs and try it again. 🙂
LikeLike
Nice to be of help. I wish you luck!
LikeLike
thanks! I think I will love the cartridge, I just could not get them to stay coiled while I glued. And it took me forever to figure out (and I had to watch a you tube video) to see what the circle was for. 🙂 But – a knitting needle! I have some of those – lol!
LikeLike
What a sweet tutorial. The roses are lovely. You could try dipping the ends of the petals in glue and then in glitter to give a sparkling effect xx
LikeLike
Great idea. I shall look for some of the clear glitter just to give them a hint of a glisten.
LikeLike
I love these,they look so good.They never turn out like this when I do it!
LikeLike
More luck than judgement I think but thank you very much.
LikeLike
They look beautiful, and using the printed paper is a really nice idea. Thanks for sharing how to make them.
LikeLike